Desserts
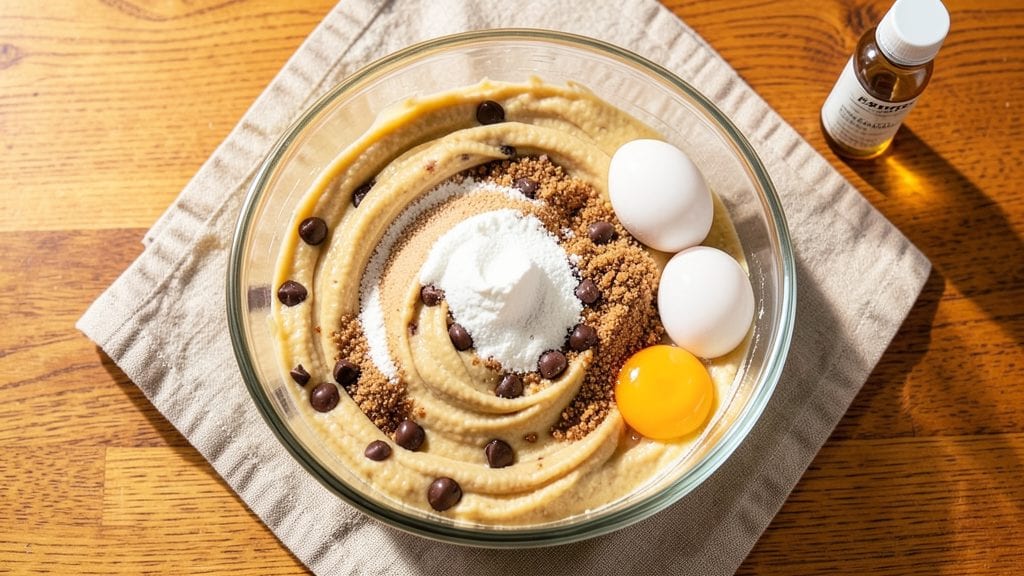
The Betty Crocker classic chocolate chip cookie recipe delivers that perfect balance of crispy edges and warm, gooey centers—just like the ones from your favorite bakery.
I’ve baked these dozens of times, and this method consistently produces cookies with the ideal texture and rich chocolate flavor that makes them impossible to resist.
The secret lies in the right ratio of butter to sugar and how you handle the dough, ensuring every batch turns out just as good as the last.
This recipe stays true to Betty Crocker’s trusted tradition while offering a few modern touches, like the option to add nuts or white chocolate for extra depth.
With just a handful of simple ingredients—flour, butter, sugar, eggs, and, of course, chocolate chips—you’ll create cookies that are foolproof and perfect for any occasion. The key is patience: letting the dough rest and baking at the right temperature ensures those signature crispy edges and chewy centers every time.
What you’ll end up with is a tray of golden-brown cookies that smell like comfort and taste even better. The chocolate chips stay melty in the center, while the edges develop that satisfying crunch.
These cookies are perfect for holidays, potlucks, or just a sweet treat on a busy weeknight. Once you try this recipe, you’ll never go back to store-bought again.
Ready to bake? Let’s get started with the ingredients and instructions—this recipe is designed to be straightforward, so you’ll have warm, delicious cookies on your table in no time. Whether you’re a beginner or a seasoned baker, these classic chocolate chip cookies will become your new favorite.
Ingredients for betty crocker classic chocolate chip cookie
The perfect mix of crispy edges and gooey centers starts with these simple ingredients.
| Ingredient | Amount | Notes |
|---|---|---|
| Unsalted Butter 🧈 | 1 cup | Cold, cubed for best texture |
| Granulated Sugar 🍚 | ¾ cup | White sugar preferred |
| Packed Brown Sugar 🍚 | ¾ cup | Light or dark brown works |
| Large Eggs 🥚 | 2 whole | Room temperature preferred |
| Vanilla Extract 🌿 | 2 tsp | Pure vanilla preferred |
| All-Purpose Flour 🌾 | 3 ½ cups | Sifted for light texture |
| Baking Soda 🧂 | 1 tsp | Pure baking soda |
| Salt 🧂 | 1 tsp | Fine sea salt preferred |
| Chocolate Chips 🍫 | 2 cups | Semi-sweet preferred |
| Toasted Walnuts 🥜 | 1 cup | Optional for crunch |
The butter is non-negotiable—use unsalted and keep it cold when mixing. I always grab Land O’Lakes or Plugrah from the store; they’re reliable and affordable. The chocolate chips? Nestlé Toll House semi-sweet are the gold standard, but any quality brand works. For the sugar, Domino or C&H are solid choices—just make sure it’s not clumpy. The vanilla extract should be pure, not imitation. McCormick or Nielsen-Massey are great brands, but any good-quality extract will do. The walnuts? Toast them in a dry pan for 3-4 minutes until fragrant—that aroma makes all the difference.
No vanilla extract? Vanilla bean paste or even a pinch of vanilla sugar works in a pinch. Short on brown sugar? Substitute white sugar plus 1 tsp molasses for depth. The flour needs to be all-purpose—King Arthur or Bob’s Red Mill are my go-tos. For chocolate chips, white chocolate or butterscotch chips add fun variations. If you’re feeling fancy, swap half the semi-sweet chips for dark chocolate chunks. The baking soda and salt are simple but critical—don’t skip either. And if you’re out of walnuts, pecans or almonds work just as well.
This dough keeps best in the fridge for up to 48 hours, covered tightly. For longer storage, wrap tightly and freeze for up to 3 months. Scoop the dough into balls right before baking—keep them cold until they hit the pan. The cookies will taste even better the next day once the flavors meld. I like to portion the dough into 1.5 oz balls for perfect-sized cookies—use a kitchen scale for consistency. And if you’ve got leftovers? Warm them in the oven for 2-3 minutes to bring back that fresh-baked magic.
Why You'll Love This Recipe
- No-Fuss Mixing: I swear by the creamy butter and sugars—just cream until light, toss in eggs and vanilla, then fold in chips. No food processor, no stress, just a bowl and a spatula.
- Chewy Crisp Magic: That perfect balance of crisp edges and soft centers? It’s all in the brown sugar and butter ratio. Warm, buttery, and just sweet enough to keep me reaching for another.
- Party-Proof Staple: From holiday cookie platters to after-school snacks, these disappear fast. Double the batch, freeze half, and you’ve got a treat ready for any moment—no last-minute baking panic.
- Budget-Friendly Indulgence: A single batch costs pennies but tastes like a bakery splurge. Butter and sugar stretch far, and the leftovers? Still delicious days later—just reheat or enjoy cold with milk.
Step-by-step instructions for Betty Crocker classic chocolate chip cookies
Here's the foolproof method for those legendary cookies with perfect crispy edges and gooey centers.
Cream the Butter and Sugars Together
In a large mixing bowl, combine the 1 cup unsalted butter, 0.75 cup granulated sugar, and 0.75 cup packed brown sugar. Using a hand mixer or stand mixer with the paddle attachment, beat on medium speed for about 3 minutes. You'll know it's ready when the mixture is light and fluffy, nearly doubling in volume. This step is crucial—it incorporates air that creates those beautiful crackly tops.
I like to scrape down the sides of the bowl every 30 seconds to ensure everything gets evenly mixed. The butter should be completely smooth with no visible lumps. If you're using cold butter, let it sit at room temperature for about 30 minutes before starting—this makes the creaming process much easier and prevents greasy cookies.
Add Eggs and Vanilla Extract
Add the 2 whole large eggs, one at a time, mixing well after each addition. Then stir in the 2 teaspoons vanilla extract. The mixture will look slightly curdled at first, but don't worry—it will come together when we add the dry ingredients. This is where the classic flavor really starts developing, so take your time with this step.
I always use room temperature eggs for best results. They blend more smoothly into the butter mixture. If you're short on time, you can use cold eggs, but they might make the dough slightly thicker. The vanilla extract should be pure, not imitation—it makes a noticeable difference in the final flavor.
Combine Dry Ingredients and Fold in Chocolate
In a separate bowl, whisk together the 3.5 cups all-purpose flour, 1 teaspoon baking soda, and 1 teaspoon salt. Gradually add this dry mixture to the wet ingredients, mixing on low speed just until combined. Be careful not to overmix—you should still see some flour streaks. Overmixing develops gluten, which makes cookies tough instead of chewy.
Remove the bowl from the mixer and gently fold in the 2 cups chocolate chips and 1 cup toasted walnuts using a spatula. I like to distribute them evenly throughout the dough. The walnuts add a nice crunch that contrasts perfectly with the soft cookie. If you prefer, you can skip the walnuts and add more chocolate chips instead.
Chill the Dough for Perfect Texture
Cover the mixing bowl with plastic wrap and refrigerate for at least 1 hour, or up to 24 hours. This chilling step is absolutely essential—it prevents the cookies from spreading too much in the oven and helps develop the classic texture. The cold dough also makes it easier to handle and portion the cookies evenly.
I find that chilling overnight actually improves the flavor as the ingredients meld together. If you're in a hurry, the minimum 1-hour chill will still give you great results. Just make sure the dough is thoroughly cold before you start baking—you can even press a piece to test if it's firm enough.
Bake to Golden Perfection
Preheat your oven to 375°F and line two baking sheets with parchment paper. Using a cookie scoop or tablespoon, drop rounded tablespoons of dough onto the prepared sheets, spacing them about 2 inches apart. They won't spread much after chilling, so you can place them a bit closer than you might normally.
Bake for 9 to 11 minutes, or until the edges are golden brown and the centers look slightly underdone. The cookies will continue cooking on the hot baking sheet after you remove them. I like to rotate the pans halfway through baking for even browning. Remove from the oven when the edges are just starting to turn golden—overbaking makes them too crispy.
Let the cookies cool on the baking sheets for 5 minutes before transferring to a wire rack to cool completely. This resting time helps them set properly. The centers should still be soft and gooey when you take a bite, while the edges have that perfect crispy texture that makes these cookies so irresistible.
Pro Tips For Making Betty Crocker Classic Chocolate Chip Cookie
- MEASURE BUTTER COOL: The recipe calls for softened butter, but "softened" is a gray area—this is where cookies go wrong. Stick your stick of butter in the fridge for 20 minutes after taking it out, then press your thumb into it. If it holds a slight indent but doesn’t smear, you’re golden. Over-soft butter = flat, greasy cookies. (Yes, even if you’re impatient like me.)
- CREAM SUGARS LOW: Use the paddle attachment, not the whisk, and go slow. The goal is to get fluffy, light batter, not a sugar paste. If your mixer starts making a mess, stop and scrape the bowl—this isn’t a race. My grandmother swore by this, and she was right: rushed creaming = dense cookies that taste like they’re packed with sugar instead of caramelized properly.
- SKIP THE OVERMIXING: Once the wet ingredients are combined, fold in the dry stuff just until no flour streaks remain. Two or three turns with a spatula is all it takes. I learned this the hard way—overmixing develops gluten, and suddenly you’ve got chewy cookies instead of the classic tender-but-sturdy texture Betty Crocker promised. Resist the urge to "really get it mixed."
- CHILL DOUGH 24 HOURS: This isn’t the prettiest method, but it’s the tastiest. Divide your dough into balls, flatten them slightly, and refrigerate overnight. The next day, bake as directed—but now you’ve got cookies with deeper flavor, crisp edges, and that perfect chew. (Your future self will thank you, even if you’re tempted to bake them fresh.)
Storing and reheating this dish
Fridge Storage Tips
Store baked cookies in an airtight container at room temperature for up to 3 days, but refrigeration extends freshness to 5-7 days. I use glass containers with silicone seals—they keep cookies soft and prevent drying.
For best results, let cookies cool completely before storing to avoid condensation. If they lose crispiness, reheat in a 350°F oven for 3-5 minutes to restore that fresh-baked texture. 💡
Freezer Preservation
Wrap individual cookies in plastic wrap or place them in a freezer bag with parchment paper between layers to prevent sticking. They’ll stay fresh for up to 3 months in the freezer.
When ready to enjoy, thaw at room temperature for 30 minutes or warm directly in the oven at 350°F for 5-7 minutes for that gooey center. I always reheat them this way—they taste almost as good as fresh-baked! ❄️
Reviving Stale Cookies
If your cookies have lost their crispness, don’t toss them! Place them on a baking sheet and warm in a 350°F oven for 5 minutes. For extra moisture, sprinkle a few drops of water or milk before reheating.
This trick works like magic—even cookies that’ve been sitting for a week taste fresh again. I keep a stash of these in my freezer for quick treats. 🍪
Dough Storage Hacks
Unbaked dough can be refrigerated for up to 48 hours or frozen for 3 months. Portion it into 1.5 oz balls before freezing for easy baking later. When ready to bake, let frozen dough sit at room temperature for 15 minutes before placing on the sheet.
This ensures even baking and prevents cracks. I label my dough balls with dates to track freshness—no more guessing! 📅
Portioning for Perfection
Use a kitchen scale for consistent cookie size—1.5 oz balls yield perfect cookies. If you don’t have a scale, a tablespoon works in a pinch (though results may vary).
Chill the dough before portioning to prevent spreading. For extra crispy edges, flatten the dough balls slightly before baking. This trick ensures even browning and that signature crackly top. 🔥
Reheating Leftovers
For a quick fix, microwave cookies for 10-15 seconds to soften them slightly. For the best texture, reheat in the oven at 300°F for 3-4 minutes. If you’re reheating a whole batch, spread them on a baking sheet to avoid sogginess.
I love this method because it restores the cookies’ aroma and texture—almost like they’re fresh out of the oven! 💫
Nutrition facts
Frequently asked questions
Why does my dough spread too much in the oven?
This usually happens when the dough isn't chilled long enough or the butter is too soft. Always refrigerate the dough for at least 1 hour (or overnight for best results) and use cold butter. If your kitchen is warm, chill the dough an extra 30 minutes before baking. Also, flatten the dough balls slightly before placing them on the sheet for better control.
Can I substitute butter with another fat?
For the best texture, stick with butter—but you can use vegetable shortening or coconut oil in a pinch. If using coconut oil, make sure it's solid when measuring. Shortening will give you a slightly crispier cookie, while coconut oil adds a subtle sweetness. Just remember, these substitutions may slightly alter the classic flavor and texture.
How do I get chocolate chips to stay melty in the center?
Underbaking is key! Remove cookies when the edges are just golden but the centers still look soft. They'll finish cooking on the hot sheet. Also, use high-quality chocolate chips—they melt more evenly. For extra insurance, bake one tray at a time to avoid overcrowding, which can cause uneven heating.
What's the best way to make these cookies gluten-free?
Replace the all-purpose flour with a 1:1 gluten-free baking flour blend (like Bob's Red Mill or King Arthur). Add 1 teaspoon xanthan gum to help bind the dough. You may need to adjust the leavening slightly—start with 1.5 teaspoons baking soda and reduce to 1 teaspoon if the cookies spread too much. Chill the dough longer (up to 2 hours) for better texture.
Can I make these cookies ahead of time?
Bake them up to 3 days ahead and store in an airtight container at room temperature. For longer storage, freeze the baked cookies for up to 3 months. Reheat in a 350°F oven for 3-5 minutes to restore that fresh-baked aroma and texture. The flavors actually improve with time!