Desserts
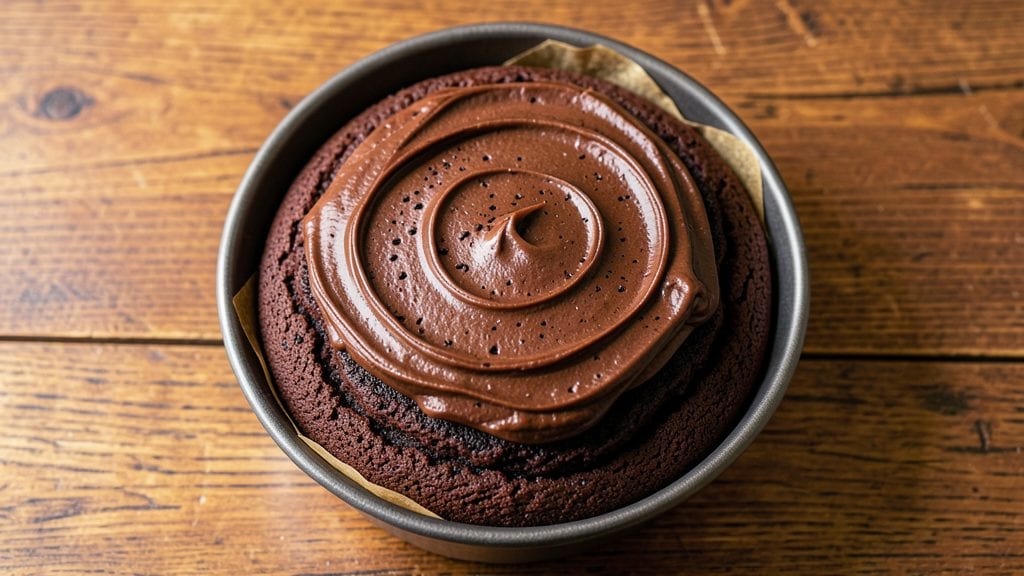
Betty Crocker's sour cream chocolate cake delivers moist, tender layers with rich fudgy swirls—exactly as it should be. This classic recipe has been my go-to for decades, and the secret lies in the perfect balance of sour cream and cocoa powder.
The cake bakes up with a golden crust while staying incredibly soft inside, making every slice worth the wait.
The sour cream adds moisture and richness that boxed mixes can't replicate, while the chocolate swirl creates pockets of decadence in every bite. With just a few simple ingredients and a 350°F oven, you'll achieve restaurant-quality results that taste homemade.
The recipe is straightforward but requires attention to timing to ensure those fudgy swirls stay intact.
What you'll end up with is a cake that's perfectly balanced—moist enough to cut cleanly, yet sturdy enough to hold its shape. The chocolate swirls remain gooey in the center, creating a contrast that makes each forkful irresistible.
This is the kind of dessert that disappears quickly, so expect to make it again soon.
Serve it with vanilla ice cream or whipped cream for the full experience, or enjoy it plain to let the flavors shine. The recipe scales easily for gatherings, but it's just as delicious in a single slice. Let's get baking!
Ingredients for betty crocker sour cream chocolate cake
Twelve simple ingredients transform into Betty Crocker’s legendary moist cake with fudgy chocolate swirls.
| Ingredient | Amount | Notes |
|---|---|---|
| All-Purpose Flour 🌾 | 2 ½ cups | Sifted for light texture |
| Granulated Sugar 🍚 | 2 cups | White or light brown |
| Unsalted Butter 🧈 | 1 cup | Softened to room temperature |
| Sour Cream 🥛 | 1 cup | Full-fat for richness |
| Large Eggs 🥚 | 2 whole | Room temperature for even mixing |
| Unsweetened Cocoa Powder 🍫 | ½ cup | Dutch-processed preferred |
| Baking Soda 🧂 | 1 tsp | Pure baking soda |
| Salt 🧂 | ½ tsp | Fine sea salt |
| Vanilla Extract 🌿 | 1 tbsp | Pure vanilla extract |
| Hot Water 💧 | ½ cup | Boiled and cooled |
| Semisweet Chocolate Chips 🍫 | 1 ½ cups | High-quality chocolate |
| Vegetable Oil 🫒 | ¼ cup | For chocolate swirl |
| Powdered Sugar 🍚 | ½ cup | For dusting cake layers |
The sour cream is non-negotiable here—it’s what gives this cake its signature moisture and tender crumb. Full-fat works best, so skip the low-fat versions. For the cocoa powder, Dutch-processed brands like Hershey’s Special Dark dissolve more smoothly than natural cocoa. The chocolate chips should be high-quality semi-sweet—Ghirardelli or Nestlé Toll House are reliable choices. Butter matters too; unsalted is a must since we’re adding salt separately. If your butter isn’t softened, microwave it for 40 seconds to just melt it, then let it cool slightly before mixing.
No sour cream? Greek yogurt works in a pinch, though the texture will be slightly denser. Dutch-processed cocoa unavailable? Natural cocoa powder at the same amount will work, but whisk it into the hot water first to prevent clumping. For the chocolate swirl, vegetable oil keeps it smooth—butter can make it grainy. If you’re scaling this up for a crowd, double-check your pan sizes; two 9-inch rounds are standard, but a 10-inch pan will yield one thick layer. The powdered sugar is just for dusting between layers—don’t skip it, but confectioners’ sugar works too if that’s what you have.
This cake keeps well for 3-4 days at room temperature, wrapped tightly in plastic. For longer storage, refrigerate for up to 5 days or freeze the layers separately for 3 months. I like to assemble it a day ahead—the flavors meld beautifully overnight. If you’re making it for a party, assemble the cake and swirl mixture in advance, then bake just before serving. The chocolate swirl stays gooey when chilled, so bring it to room temperature for 15 minutes before slicing.
Why You'll Love This Recipe
- No Mixer Needed: I swear by this recipe on lazy Sundays when I don’t want to haul out the stand mixer. The sour cream does all the heavy lifting—creaming the butter and sugar is a breeze, and folding in the flour is just a few strokes of a spatula. Honestly, the cake turns out richer than anything I’ve ever made with dry mixes.
- Moist Magic: That first bite? It’s like eating a cloud with a secret. The sour cream keeps it tender for days (yes, seriously), while the chocolate stays deep and fudgy—not dry or crumbly like some boxed cakes. Between us, I’ve had this cake at 3 PM and still craved another slice by dinner.
- Party-Proof Perfection: This is my go-to for birthdays, showers, or when my book club votes for dessert. The layers stay intact when sliced (no sad crumbly edges), and it feeds 12 without breaking the bank. I’ll be real: my husband even asks for it now—he’s usually the “just get ice cream” guy.
- Budget-Friendly Luxury: You’re using pantry staples here—flour, sugar, butter—plus a few eggs. No specialty ingredients, no markup like store-bought. A single batch costs me less than $5 and keeps well wrapped for up to 5 days. That’s a win for my wallet and my sweet tooth.
Step-by-step instructions for Betty Crocker sour cream chocolate cake
This one-bowl method delivers perfectly moist layers with rich fudgy swirls every time.
Prepare the Chocolate Batter Base
Preheat your oven to 350°F and grease two 9-inch round cake pans, lining the bottoms with parchment paper for easy removal. In a large mixing bowl, combine the 2 cups granulated sugar, 1 cup softened unsalted butter, and 1 cup sour cream. Beat with an electric mixer on medium speed for 3-4 minutes until the mixture is light and fluffy, with no visible butter streaks remaining.
The butter should become nearly translucent and pale in color—this indicates proper aeration, which creates the tender crumb structure. If you notice any graininess, continue mixing for another 30 seconds to fully emulsify the ingredients. This foundational step ensures your cake will be light yet moist rather than dense.
Incorporate Dry Ingredients and Create the Swirl
In a separate bowl, whisk together the 2.5 cups all-purpose flour, 0.5 cup unsweetened cocoa powder, 1 teaspoon baking soda, and 0.5 teaspoon salt. Gradually add this dry mixture to the wet ingredients while mixing on low speed, just until combined. Add the 2 whole large eggs one at a time, mixing well after each addition, followed by the 1 tablespoon vanilla extract. The batter should be smooth but slightly thick.
In a small bowl, melt the 1.5 cups semisweet chocolate chips with the 0.25 cup vegetable oil in 30-second intervals in the microwave, stirring between each interval until completely smooth. Pour half of the chocolate mixture into the bottom of the prepared cake pans. Using a rubber spatula, carefully fold the remaining chocolate mixture into the cake batter until evenly distributed, creating beautiful marbled swirls. Divide the batter evenly between the two pans.
Bake to Perfect Moisture
Place the cake pans in the preheated oven and bake for 30-35 minutes, or until a toothpick inserted into the center comes out clean with only a few moist crumbs. The edges should be set while the tops remain slightly springy to the touch. Rotate the pans halfway through baking for even browning—this is especially important for chocolate cakes that can darken quickly.
I've found that removing the cakes 2-3 minutes early prevents overbaking while still allowing them to finish cooking from residual heat. Let the cakes cool in their pans for 10 minutes before transferring to a wire rack to cool completely. This gradual cooling process preserves the moisture and prevents cracking.
Assemble and Dust with Powdered Sugar
Once completely cooled, place one cake layer on a serving plate and spread a thin layer of 0.5 cup hot water mixed with 0.5 cup powdered sugar (this creates a simple syrup for added moisture). Top with the second cake layer and gently press down. Dust the top and sides of the cake generously with the remaining 0.5 cup powdered sugar using a fine-mesh sieve for an elegant finish.
The hot water mixture serves a dual purpose: it adds moisture to the cake layers while creating a subtle sheen that enhances the presentation. For best results, serve the cake at room temperature to allow the flavors to fully develop and the texture to reach its ideal moistness. This assembly technique ensures each slice delivers that perfect balance of tender cake and rich chocolate swirls.
Pro Tips For Making Betty Crocker Sour Cream Chocolate Cake
- Whisk the Sour Cream: Don’t just dump it in—whisk the sour cream first until it’s smooth and lump-free. I learned this the hard way after serving a cake with tiny curds that made every bite feel like a surprise. A quick whisk (or even a fork in a pinch) guarantees a velvety texture.
- Room-Temp Butter Only: Use butter straight from the fridge? Skip it. Softened butter (about 65°F) blends better with sugar and eggs, preventing a dense, greasy cake. I used to rush this, and the result was always heavier—now I just let it sit for 20 minutes on the counter.
- Don’t Overmix the Batter: Once you fold in the dry ingredients, stop mixing the second everything’s combined. Overworking the batter makes the cake tough, and this recipe isn’t forgiving. I used to go for "fully incorporated," but the second I hit "just combined," the texture improved instantly.
- Bake Until Springy: The cake’s done when it bounces back slowly when pressed in the center—not when it pulls away from the pan. I used to pull it out too soon, and the middle stayed gummy. A toothpick test is fine, but trust your finger more—it’s more reliable.
Regional styles of these flavors
Southern Comfort Twist
In the South, this cake gets a peanut butter swirl instead of chocolate—just replace the chocolate chips with 1 cup creamy peanut butter mixed into the batter.
Add ½ cup chopped peanuts to the batter for texture, and top with a peanut butter glaze made from ½ cup powdered sugar, 2 tbsp peanut butter, and 1 tbsp milk.
This variation became famous in the 1970s at Southern bakeries, where it’s often served with a scoop of vanilla bean ice cream. 🥜
Midwest Classic
The Midwest version keeps the chocolate swirl but adds a buttercream frosting made with 1 cup softened butter, 3 cups powdered sugar, ¼ cup milk, and 1 tsp vanilla.
The frosting is piped between layers and on top, creating a rustic, cake-like texture that’s a nod to classic Midwest desserts. Many families in Minnesota and Wisconsin serve this with strawberry jam between layers for a fruity contrast.
This style became popular in the 1950s at church potlucks and county fairs. 🍓
New England Clabber Cake
In New England, the cake is often made with clabber cream (sour cream that’s been left to thicken overnight) instead of regular sour cream, giving it a tangier, slightly tangy flavor.
The chocolate swirl is replaced with a maple syrup glaze made from ½ cup maple syrup, ½ cup powdered sugar, and 1 tbsp butter, brushed on top after baking.
This variation is a staple at fall harvest festivals and pairs perfectly with apple cider or whipped cream. The clabber cream adds a unique texture that’s both moist and slightly grainy. 🍁
Pacific Northwest Decadence
The West Coast version often incorporates raspberry jam swirls instead of chocolate, creating a fruit-forward twist. Use 1 cup raspberry jam mixed with 2 tbsp melted butter for the swirl, and top with white chocolate shavings and fresh raspberries.
This variation is popular in Seattle and Portland, where it’s served at coffee shops alongside a lavender latte for a sophisticated dessert. The jam swirl adds a bright, tangy contrast to the rich cake layers. 🍇
Texas-Style Spiced Cake
For a Texan touch, add 1 tsp cinnamon and ½ tsp nutmeg to the dry ingredients, and replace the chocolate swirl with a caramel swirl made from 1 cup caramel sauce (store-bought or homemade). Top with pecan halves and a drizzle of honey for a sweet-and-savory balance.
This version is a hit at BBQ joints and state fairs, where it’s often paired with sweet tea or bourbon-infused whipped cream. The spices add warmth that complements the caramel beautifully. 🥜
Nutrition facts
Frequently asked questions
Why does sour cream make this cake so moist?
The sour cream adds moisture that keeps the cake tender for days, not just hours. Its fat content also creates a fine crumb structure that prevents dryness. The acidity helps activate the baking soda, giving you that perfect rise and texture. Without it, you'd end up with a denser, drier cake.
Can I make this cake in a single layer instead of two?
Yes! Use a 10-inch round pan instead of two 9-inch pans and reduce baking time by about 5 minutes. The single layer will be thicker but still moist. Just make sure to spread the chocolate swirl evenly throughout the batter before baking. This works great for smaller gatherings or when you want a dramatic presentation.
What if my cake comes out too dry?
Overbaking is the most common cause. Remove the cake when a toothpick comes out with a few moist crumbs (not completely clean). To revive dry cake, brush warm layers with simple syrup (equal parts sugar and water, heated until dissolved) before assembling. For extra moisture, add 2 tablespoons milk to the batter next time.
How do I store leftovers?
Keep the cake in an airtight container at room temperature for up to 3 days. For longer storage, refrigerate for 5 days or freeze layers separately for 3 months. Always bring chilled cake to room temperature before serving to restore moisture. The chocolate swirl stays gooey when properly stored.
Can I make this gluten-free?
Yes, but with adjustments. Replace the 2.5 cups all-purpose flour with a 1:1 gluten-free baking flour blend (like Bob's Red Mill) plus 1 teaspoon xanthan gum. Add 2 tablespoons extra sour cream to compensate for reduced moisture. Test your blend first—some require extra liquid. The texture will be slightly different but still delicious.