Desserts
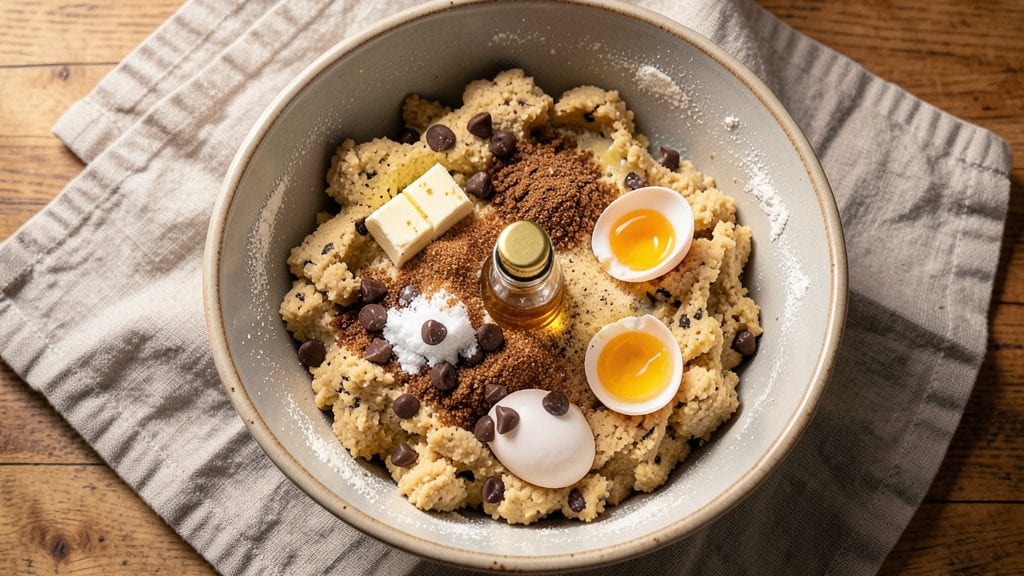
This classic Toll House chocolate chip cookie recipe delivers the warm vanilla aroma and perfectly browned chips that made Nestlé’s original famous. The secret lies in cold butter and a precise dough-to-chip ratio that ensures every bite has that signature chewy center and crisp edges.
I’ve baked these hundreds of times—this is the version that never disappoints.
The original Toll House recipe was created in 1938 when a baker tested Nestlé’s semi-sweet chocolate chips in cookies, and the rest is history.
What makes these cookies truly authentic is the balance of ingredients: rich brown sugar for caramel depth, vanilla extract for warmth, and just the right amount of flour to hold everything together without overpowering the chocolate.
Once baked at 350°F for 10–12 minutes, you’ll have golden-brown cookies with edges that stay crisp while the centers remain tender. The chocolate chips melt just enough to create pockets of gooey goodness, but not so much that they turn into a puddle.
This is the kind of cookie that disappears from plates faster than you can say “Toll House.”
For those who love to experiment, try adding sea salt flakes or swapping in dark chocolate chips for a deeper flavor. The dough can be chilled for up to 48 hours, making these perfect for holiday baking or last-minute treats. Let’s get baking!
Ingredients for classic toll house chocolate chip cookie
Cold butter, caramel brown sugar, and vanilla—just nine ingredients for cookies that taste like nostalgia.
| Ingredient | Amount | Notes |
|---|---|---|
| Unsalted Butter 🧈 | 1 cup | Cold, cubed for texture |
| Granulated Sugar 🍚 | ¾ cup | Standard white sugar |
| Packed Brown Sugar 🍯 | ¾ cup | Rich caramel depth |
| Pure Vanilla Extract 🍶 | 2 tsp | High-quality preferred |
| Large Eggs 🥚 | 2 whole | Room temperature |
| All-Purpose Flour 🌾 | 2 ½ cups | Spooning, not scooping |
| Baking Soda 🧂 | 1 tsp | Freshly opened |
| Salt 🧂 | 1 tsp | Fine sea salt |
| Semi-Sweet Chocolate Chips 🍫 | 2 cups | Nestlé Toll House brand |
| Flaky Sea Salt 🧂 | ½ tsp | For finishing (optional) |
The butter needs to be cold—cut into cubes and let it sit out for 20 minutes before mixing. Land O’Lakes or Plugrá are my go-tos, but any unsalted works. Brown sugar should be packed tight—tap the measuring cup to settle it. Vanilla extract matters here: Kirkland or Nielsen-Massey are reliable, but whatever you’ve got is fine. The chocolate chips? Nestlé’s semi-sweet are the original, but Ghirardelli or Enjoy Life (for allergies) work too. Pro tip: measure chips by volume, not weight—they’ll melt down differently.
No vanilla extract? 1 tsp vanilla bean paste works, or even 1 tsp almond extract at half the amount—but don’t overdo it. Short on brown sugar? Substitute white sugar plus 1 tsp molasses for that caramel note. Want extra richness? Add 1 tbsp melted butter to the dough. The dough should be thick but scoopable—if it’s too sticky, chill it 15 minutes. And yes, pre-shredded chocolate gets clumpy, so chips are non-negotiable here.
Dough keeps 48 hours in the fridge (perfect for holiday baking) or 3 months frozen in a sealed bag. Scoop with a 3-tbsp cookie scoop for classic size. Bake at 350°F for 10–12 minutes—edges golden, centers soft. Sprinkle with flaky salt while warm. Leftovers? 3 days at room temp in an airtight container, or freeze for 1 month. Trust me, they’ll disappear faster than you can say ‘Toll House.’
Why You'll Love This Recipe
- Five-Ingredient Magic: I swear by this recipe because it’s the simplest I’ve ever mastered. Cream butter, toss in sugars, add vanilla and eggs—no fancy mixers or last-minute ingredient hunts. The dough comes together in minutes, and honestly? That’s half the battle won.
- Butter-Brown Sugar Bliss: Between us, that creamy brown sugar and cold butter combo is where the real magic happens. The cookies spread just enough for crisp edges but stay soft inside, with a caramelized chew that makes them impossible to stop eating. (Yes, even on a Tuesday night.)
- Every Occasion Cookie: These are my go-to for holiday gifts, school bake sales, or just because. Double the batch, freeze half—no one will complain when they thaw into warm, melty perfection. My daughter picks out the chocolate chips, but still asks for seconds.
- Leftovers? More Like Leftovers Never: I’ve never had a batch last less than a week in my house. The dough keeps in the fridge for days, and the cookies reheat beautifully. Best part? You’re using pantry staples—no overpriced specialty items here. Budget-friendly, foolproof, and always satisfying.
Step-by-step instructions for classic Toll House chocolate chip cookies
Here's how to make the perfect batch—crispy edges, chewy centers, and melty chocolate every time.
Cream the Butter and Sugars
In a large mixing bowl, combine the 1 cup unsalted butter (cold and cubed) with the 0.75 cup granulated sugar and 0.75 cup packed brown sugar. Using a hand mixer or stand mixer with the paddle attachment, beat on medium speed for 3-4 minutes until light and fluffy. You’ll know it’s ready when the mixture nearly doubles in volume and looks pale and airy.
This creaming step is crucial—it incorporates air into the dough, which creates those signature crackly tops and helps the cookies spread just right. If you skip it, your cookies will turn out dense instead of chewy. Scrape down the sides of the bowl with a rubber spatula every so often to ensure even mixing.
Add Eggs and Vanilla
Reduce the mixer speed to low and add the 2 whole large eggs, one at a time, mixing just until each is fully incorporated. Then, add the 2 teaspoons pure vanilla extract and mix for another 10-15 seconds until fully combined. The mixture will look slightly thicker and smoother.
Here’s the thing—don’t overmix the eggs. You’re just trying to blend them in, not turn the dough into a batter. If it looks curdled at first, that’s okay; the dry ingredients will smooth it out in the next step. The vanilla adds that classic warm, sweet aroma that makes these cookies so irresistible.
Mix in Dry Ingredients and Chocolate Chips
In a separate bowl, whisk together the 2.5 cups all-purpose flour, 1 teaspoon baking soda, and 1 teaspoon salt. Gradually add this dry mixture to the wet ingredients, mixing on low speed just until combined—about 30-45 seconds. You should still see a few flour streaks, and the dough will look shaggy but hold together.
Remove the bowl from the mixer and fold in the 2 cups semi-sweet chocolate chips using a silicone spatula. Be gentle—you don’t want to break up the chips. The dough will be thick, sticky, and slightly uneven, but that’s exactly how it should be. If it feels too soft to handle, pop it back in the fridge for 10-15 minutes while you preheat the oven.
Chill the Dough for Better Texture
Cover the bowl with plastic wrap and refrigerate for at least 30 minutes, but up to 24 hours if you’re planning ahead. Chilling the dough is non-negotiable—it firms up the butter, which prevents the cookies from spreading too thin in the oven. It also lets the flour fully hydrate, resulting in a chewier, more flavorful cookie.
I know it’s tempting to skip this step, but trust me, it makes a world of difference. Cold dough also means the cookies hold their shape better, giving you those thick, bakery-style cookies instead of flat, crispy rounds. If you’re in a rush, at least 20 minutes in the fridge will help.
Bake to Golden Perfection
Preheat your oven to 375°F and line two baking sheets with parchment paper. Using a 2-tablespoon cookie scoop (or a regular tablespoon), drop rounded mounds of dough onto the prepared sheets, spacing them 2 inches apart. They won’t spread much after chilling, but giving them room ensures even baking.
Bake for 9-11 minutes, rotating the sheets halfway through, until the edges are golden brown and the centers look just slightly underdone. The tops should have a few cracks, and the chocolate chips should be soft but not melted into puddles. If you pull them out too soon, they’ll be cakey; if you leave them in too long, they’ll burn. Timing is everything here.
Let the cookies cool on the baking sheet for 5 minutes before transferring them to a wire rack. While they’re still warm, sprinkle each with a pinch of 0.5 teaspoon flaky sea salt for that perfect balance of sweet and salty. Serve them warm for the ultimate experience—gooey centers, crispy edges, and melty chocolate in every bite.
Pro Tips For Making Classic Toll House Chocolate Chip Cookie
- Cream Butter Slowly: Dump cold butter into the sugar mix and pulse your mixer—you’ll end up with a grainy, sad dough. Instead, soften the butter to room temp (press your finger in; it should leave a slight dent), then beat it with the sugars until the color lightens noticeably. That’s when the fat fully emulsifies with the sugars, making your cookies chewy and tender—not dry or crumbly.
- Pack That Brown Sugar: The recipe calls for packed brown sugar, and skimming this step is a fast track to flat, cakey cookies. Use a spoon to press the sugar firmly into the measuring cup, then level it off. Too much air = cookies that spread like pancakes instead of holding their shape.
- Underbake Slightly: Toll House cookies look done when the edges are golden but the centers still wiggle like Jell-O. Pull them out when they’re just starting to set—about 30 seconds before the recipe’s suggested time. They’ll firm up as they cool, but they’ll stay soft and gooey inside, not rubbery.
- Chill the Dough: I know, you want to bake them now. But if you skip chilling, your cookies will spread into sad, thin pancakes. Divide the dough into balls, wrap them in plastic, and refrigerate for at least 2 hours (or overnight). The flour absorbs moisture, and the butter firms up—resulting in thicker, chewier cookies with better texture.
Pro cooking tips for perfect results
Cold Butter Magic
The secret to the perfect Toll House cookie starts with cold butter—never softened or melted. Cut 1 cup unsalted butter into ½-inch cubes and let it sit at room temperature for 20 minutes before mixing.
This ensures the butter stays firm enough to create those signature crackly tops while still creaming properly. I use Land O’Lakes or Plugrá for the best texture, but any unsalted butter works. If your butter is too soft, chill the bowl for 10 minutes before creaming. 🧈
Dough Chilling Non-Negotiable
Chilling the dough for at least 30 minutes (up to 48 hours) is where the real magic happens. This step firms up the butter, preventing excessive spreading and creating a thicker, chewier cookie.
I always cover the dough with plastic wrap and refrigerate it while I preheat the oven. Pro tip: If your dough feels too soft to handle, give it an extra 15 minutes in the fridge. The wait ensures the cookies hold their shape and develop deeper flavor. ❄️
Scoop Size Matters
Use a 2-tablespoon cookie scoop (or a regular tablespoon) to portion the dough. This gives you the classic 2-inch diameter cookies with that perfect thick, bakery-style shape. Space them 2 inches apart on the baking sheet—they won’t spread much after chilling, but this ensures even baking.
For extra consistency, I weigh my scoops: 40 grams per cookie is ideal. If you’re short on time, use a 1.5-ounce ice cream scoop for uniform results. 🍪
Baking Time Precision
Bake at 375°F for 9–11 minutes—edges should be golden brown, and the centers should look slightly underdone. The tops will crack naturally, and the chocolate chips should be soft but not melted into puddles. Rotate the baking sheets halfway through for even heat distribution.
Overbaking is the #1 mistake—I’ve seen cookies turn into crispy crackers when left in too long. Pull them out when they still look a little soft; they’ll firm up as they cool. 🌡️
Salt Finish Elevates Flavor
While the cookies are still warm, sprinkle each with a pinch of flaky sea salt (about ½ teaspoon total). This adds a sweet-salty contrast that takes them from good to extraordinary. I use Maldon sea salt for its delicate crystals.
Let the cookies cool on the baking sheet for 5 minutes before transferring to a wire rack—this keeps them soft and prevents cracking. Serve warm for the ultimate gooey, melty experience. 💫
Oven Temperature Calibration
Ovens vary! If your cookies spread too much, your oven runs hot. Try baking at 350°F instead. If they’re too thick, your oven runs cool—bump it to 385°F.
I test my oven’s accuracy with a baking thermometer (like the Thermoworks Oven Thermometer) to ensure it reads 375°F accurately. A well-calibrated oven is the key to consistent results every time. 🔥
Nutrition facts
Frequently asked questions
Why does the original Toll House recipe use brown sugar instead of white?
The brown sugar adds moisture and caramel depth that white sugar can't match. The molasses in brown sugar creates a chewier texture and richer flavor, while the granulated sugar provides sweetness and helps create that signature crackly top. This combination is what makes these cookies taste so nostalgic and satisfying.
Can I substitute butter with another fat like shortening?
You can use 1 cup vegetable shortening instead of butter, but your cookies will taste different. Shortening makes cookies softer and cakey rather than crispy and buttery. For the classic Toll House flavor, stick with butter—it's worth the extra effort. If you're avoiding dairy, vegetable shortening or coconut oil are the next best options.
How do I fix cookies that spread too much?
If your cookies spread too thin, your butter was likely too soft or your oven runs hot. Next time, chill the dough longer (45+ minutes) and try baking at 350°F instead. Also check your oven's accuracy with a thermometer—many ovens run 25°F hotter than set. For extra structure, add 1 tablespoon cornstarch to the flour.
What's the best way to store leftover cookies?
Store cookies in an airtight container at room temperature for 3-4 days to maintain freshness. For longer storage, freeze them for up to 3 months—wrap individually in plastic wrap or place in a sealed bag. Thaw at room temperature before enjoying. The key is keeping them protected from moisture to prevent sogginess.
Can I make these cookies gluten-free?
Yes, but you'll need to substitute the all-purpose flour with a 1:1 gluten-free baking flour blend (like Bob's Red Mill). Add ½ teaspoon xanthan gum if your blend doesn't contain it. Keep in mind the texture will be slightly different—gluten-free cookies tend to be more crumbly and less chewy than traditional versions.