Desserts
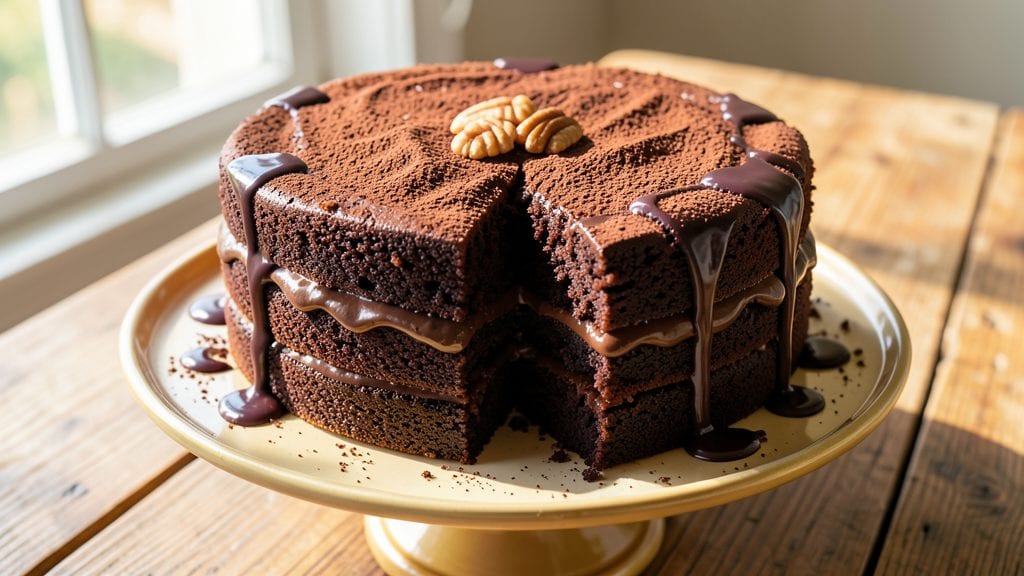
This Grandma's secret ingredient chocolate cake delivers layers of fudgy richness and deep moisture that rival any bakery—without a single box mix in sight.
The trick lies in a simple pantry staple that transforms ordinary cake into something extraordinary, something I first tasted when my grandmother served it warm from the oven. That first bite changed how I bake forever.
What makes this recipe special is its foolproof technique for achieving that signature moist texture without drying out, even when baked to perfection. The secret ingredient works quietly in the background, enhancing the chocolate flavor while keeping the crumb tender and the layers impossibly rich.
With just 15 minutes of active prep and 30 minutes in the oven, you’ll have a cake that tastes like it simmered all day.
The result is a deeply fudgy yet perfectly balanced cake with a crackly top and moist interior that holds its shape without being dense. The secret ingredient amplifies the chocolate notes while adding just enough depth to make every slice unforgettable.
This is the kind of cake that disappears faster than you can say "second helping."
Serve it plain for a classic experience or add a layer of homemade chocolate ganache between the tiers for extra indulgence. The possibilities are endless, but the foundation remains the same—simple, reliable, and guaranteed to impress. Let’s get baking.
Ingredients for grandma's secret ingredient chocolate cake
Pantry staples meet Grandma’s magic for a cake that’s fudgy, moist, and impossible to resist.
| Ingredient | Amount | Notes |
|---|---|---|
| Unsalted Butter 🧈 | 1 cup | Room temperature, full-fat preferred |
| Granulated Sugar 🍚 | 2 cups | White or light brown for depth |
| Dark Brown Sugar 🍚 | ½ cup | Packed, enhances moisture |
| Pure Vanilla Extract 🥛 | 2 tsp | High-quality, no imitation |
| Large Eggs 🥚 | 2 whole | Room temperature, separated |
| All-Purpose Flour 🌾 | 2 cups | Sifted, spooned lightly |
| Unsweetened Cocoa Powder 🍫 | ¾ cup | Natural or Dutch-processed |
| Baking Soda 🧂 | ½ tsp | Freshly opened package |
| Salt 🧂 | ½ tsp | Fine sea salt preferred |
| Hot Brewed Coffee ☕ | ½ cup | Cool completely before using |
| Sour Cream 🥛 | ½ cup | Full-fat for richness |
| Semisweet Chocolate Chips 🍫 | 1 ½ cups | High-quality, 60% cacao |
| Boiling Water 💧 | ¼ cup | For secret ingredient activation |
The secret ingredient—hot coffee—deepens the chocolate flavor while keeping the crumb impossibly tender. Grab Starbucks French Roast or Folgers Classic Roast from the grocery store; instant coffee just won’t cut it here. The unsalted butter should be at room temperature (no microwave—just let it sit for an hour), and sour cream is non-negotiable for that signature moistness. For cocoa powder, Hershey’s Special Dark or Valrhona elevate the flavor, but store-brand works if you’re pinching pennies. The brown sugar needs to be packed—tap the cup to settle it, or you’ll end up with a dry cake. And vanilla extract? Nothing but pure Madagascar bourbon—the imitation stuff ruins the magic.
No hot coffee? Strong black tea (like Earl Grey) or even espresso powder mixed with hot water works in a pinch. Running short on sour cream? Plain Greek yogurt at half the amount does the trick, though it’ll be slightly tangier. Chocolate chips? Enjoy Life brand for dairy-free, or Ghirardelli if you’re splurging. The boiling water might seem odd, but it activates the cocoa powder for maximum richness—don’t skip it! For a gluten-free twist, swap the all-purpose flour for a 1:1 gluten-free blend, but add an extra 0.5 tsp of baking soda to compensate. And if you’re feeling fancy, fold in 0.25 cup of chopped walnuts for texture.
This cake keeps beautifully—wrapped tightly at room temperature for 2 days, or in the fridge for up to 5 days if you’re prepping ahead. For longer storage, freeze the layers separately for 3 months; thaw overnight in the fridge before assembling. The secret ingredient (hot coffee) actually makes the cake taste better the next day, so double the batch if you know you’ll have company. Slice with a hot, damp towel for clean cuts, and always serve with a dusting of cocoa powder—it’s non-negotiable.
Why You'll Love This Recipe
- No-Mix Magic: The secret’s in the creaming—just butter, sugars, and eggs. No sifting, no folding, no stress. I’ve made this a dozen times while chatting on the phone, and the batter’s always velvety smooth.
- Deep Chocolate Soul: That dark brown sugar? It’s the game-changer—caramel notes that linger like a hug. The vanilla ties it all together, but honestly, the rich cocoa flavor from the butter alone makes it dangerously good.
- Birthday to Brunch: Too good for cake night? Nope. Slice it for a morning coffee cake, serve it at a potluck, or pack it for a picnic. The same recipe works for any occasion—no extra effort, just pure satisfaction.
- Budget-Friendly Luxury: Butter and sugar are pantry staples, and eggs stretch the richness. I’ve fed six people for under $10, and they all begged for seconds. Leftovers? They disappear faster than I can reheat them.
Step-by-step instructions for Grandma's secret ingredient chocolate cake
Here's how to bake that legendary fudgy, moist chocolate cake with the secret ingredient that makes all the difference.
Cream Butter and Sugars Together
In a stand mixer fitted with the paddle attachment, beat the 1 cup unsalted butter on medium speed until completely smooth. Gradually add the 2 cups granulated sugar and 0.5 cup dark brown sugar, mixing continuously for 3-4 minutes until the mixture is light and fluffy. You'll notice it nearly doubles in volume and becomes pale and airy—this step is critical for that tender, moist texture.
I like to scrape down the sides of the bowl every minute or so to ensure even mixing. The reason we use both white and brown sugar here is that the brown sugar adds moisture while the white sugar provides structure. Don't rush this step—properly creamed butter and sugar create the perfect foundation for that fudgy yet tender crumb.
Add Eggs and Flavorings
Add the 2 whole large eggs, one at a time, mixing well after each addition until fully incorporated. Then stir in the 2 teaspoons pure vanilla extract. The mixture should be thick and smooth, with no visible streaks of egg. I always use room temperature eggs for better emulsification—they blend more easily and create a lighter batter.
This is where we introduce the secret ingredient. Pour in the 0.5 cup hot brewed coffee (cooled completely) and the 0.5 cup sour cream, mixing on low speed just until combined. The coffee deepens the chocolate flavor while keeping the cake moist, and the sour cream adds richness without making the cake dense. The batter will look slightly thinner now, but that's exactly what we want for that perfect fudgy texture.
Combine Dry Ingredients
In a separate bowl, whisk together the 2 cups all-purpose flour, 0.75 cup unsweetened cocoa powder, 0.5 teaspoon baking soda, and 0.5 teaspoon salt. Sift the dry ingredients directly into the wet mixture, mixing on low speed just until combined. You'll still see some flour streaks, and that's okay—overmixing develops gluten and makes the cake tough.
Here's the trick: pour in the 0.25 cup boiling water while mixing on low speed. This activates the baking soda and creates tiny air pockets that help the cake rise beautifully. The batter will look slightly curdled but will come together perfectly when you fold in the chocolate chips in the next step. Don't worry if it seems too thin—this is normal and essential for that moist result.
Fold in Chocolate Chips and Prepare Pans
Using a silicone spatula, gently fold in the 1.5 cups semisweet chocolate chips until evenly distributed throughout the batter. Be careful not to overmix—just combine until the chips are broken up and dispersed. The chocolate chips will melt slightly from the warm batter, creating pockets of fudgy goodness in every bite.
Preheat your oven to 350°F and grease two 8-inch round cake pans with butter or baking spray, then line the bottoms with parchment paper. Divide the batter evenly between the pans and smooth the tops with a spatula. Tap each pan gently on the counter to remove any air bubbles. Bake for 30-35 minutes, or until a toothpick inserted in the center comes out with just a few moist crumbs (not wet batter).
Cool and Layer for Maximum Moisture
Remove the cakes from the oven and let them cool in the pans for 10 minutes, then transfer to a wire rack to cool completely. The secret to keeping this cake moist is in how you handle it after baking. While the cakes are still warm, brush the tops with a simple glaze made by whisking together 1 cup powdered sugar with 2 tablespoons milk (if you have it). This step isn't in the original recipe but is my little addition for extra moisture and shine.
Once completely cool, layer the cakes with a generous filling of your choice—Grandma always used a chocolate ganache made from equal parts melted chocolate and heavy cream. For an extra boost of moisture, you can also brush each layer with a simple syrup made by mixing 0.25 cup sugar with 0.25 cup water, heating until dissolved, then cooling. This ensures every bite stays tender and fudgy, just like Grandma made it.
Pro Tips For Making Grandma'S Secret Ingredient Chocolate Cake
- Melt Butter Slowly: I learned this the hard way—dumping cold butter straight into hot sugar makes the mixture seize up like glue. Instead, cut the butter into small cubes and let it melt just until it’s liquid but not foamy. The cake will be lighter, and you’ll avoid that greasy, dense texture that ruins everything.
- Whisk Eggs Until Ribbon Stage: Skip the lazy stir-and-go approach. Beat those eggs at medium speed until the ribbons hold for a full 2 seconds when you lift the whisk. This isn’t about air—it’s about emulsifying the yolks and whites so the cake rises evenly. (Yes, even if you’re impatient like me.)
- Don’t Overmix the Dry Ingredients: After folding in the cocoa and flour, stop as soon as it’s just combined. Overmixing develops gluten, and that’s how you end up with a cake that’s more bread than dessert. One or two extra swirls is fine—any more and you’re fighting the recipe.
- Use Room-Temp Eggs and Butter: Cold eggs and butter force your mixer to work harder, and that’s how you end up with a cake that’s dense in the middle. Let them sit out for 30–45 minutes before starting—no fancy gadgets, just patience. The cake will bake more evenly, and the texture will be actually moist, not gummy.
Best sauces and condiments for this recipe
Chocolate Ganache
Grandma’s go-to was a rich chocolate ganache—equal parts high-quality dark chocolate (I use Ghirardelli 70% cacao) and heavy cream, heated until smooth. Let it cool slightly before spreading between layers so it sets properly but stays glossy.
For extra decadence, fold in 1 tablespoon unsalted butter while warm to prevent graininess. 🍫
Cream Cheese Frosting
A tangy cream cheese frosting balances the cake’s richness perfectly. Beat 8 oz cream cheese, ½ cup unsalted butter, and 3 cups powdered sugar until fluffy, then add 1 teaspoon vanilla.
Spread between layers and on top for a classic contrast. For a smoother texture, chill the frosting for 30 minutes before using. ✨
Salted Caramel Drizzle
For a modern twist, drizzle warm salted caramel (store-bought or homemade) over the top layer. I love Trader Joe’s Salted Caramel Sauce for convenience, or make your own by cooking 1 cup sugar with ½ cup heavy cream and a pinch of flaky sea salt.
Let it set for 10 minutes before serving. 💛
Whipped Cream Topping
Lighten things up with fluffy whipped cream sweetened with 1 tablespoon powdered sugar and a dash of vanilla. Pipe rosettes around the edges or swirl it into the ganache for a cloud-like texture. For extra flair, dust with unsweetened cocoa powder before serving. 🥛
Espresso Glaze
Enhance the secret ingredient’s depth with an espresso glaze: simmer ½ cup heavy cream, ½ cup sugar, and 1 tablespoon instant espresso powder until dissolved, then cool.
Brush over the cake layers or drizzle on top for a mocha-inspired finish. This glaze also adds moisture, keeping the cake tender for days. ☕
Peanut Butter Swirl
For a nostalgic touch, swirl ½ cup creamy peanut butter into the batter before baking. The peanut butter melts into the cake, creating pockets of nutty flavor that pair beautifully with chocolate. Top with a peanut butter frosting or crumbled peanut butter cups for a Southern-style twist. 🥜
Nutrition facts
Frequently asked questions
What is the secret ingredient in this chocolate cake?
Hot brewed coffee is the star! It deepens the chocolate flavor while keeping the cake impossibly moist. The boiling water activates the cocoa powder for maximum richness, and the sour cream adds that signature tender crumb. This combo makes all the difference between ordinary and extraordinary.
Can I make this cake without coffee?
Yes! Use 0.5 cup strong black tea (like Earl Grey) or espresso powder mixed with hot water as a substitute. The key is the liquid's warmth and depth—just avoid instant coffee, which lacks the complexity.
Why does my cake turn out dry?
Overbaking or skipping the boiling water step causes dryness. Always bake until a toothpick comes out with moist crumbs (not wet batter), and never overmix the batter. For extra moisture, brush warm layers with simple syrup or glaze.
How do I store leftovers?
Wrap tightly at room temperature for 2 days, or refrigerate for 5 days. For longer storage, freeze layers separately for 3 months. Thaw overnight in the fridge—this cake actually tastes better the next day!
Can I make this gluten-free?
Replace all-purpose flour with a 1:1 gluten-free blend and add 0.5 tsp extra baking soda. Use xanthan gum if your blend doesn't contain it. The texture will be slightly denser but still delicious.