Desserts
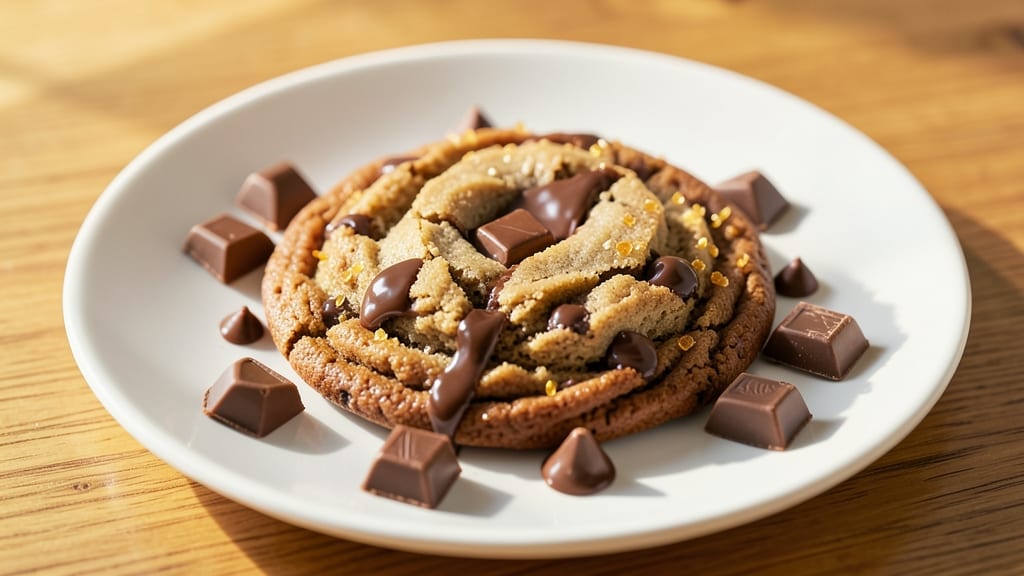
This Hershey chocolate chip cookie recipe delivers the perfect balance of warm, gooey centers and crispy edges—the kind of cookies that disappear faster than they cool. I’ve tested countless variations over the years, and this method consistently produces results that rival bakery quality while keeping prep simple.
The secret lies in precise measurements and a touch of brown sugar for depth.
What sets these apart is the Hershey chocolate chips, which stay melty longer than store-brand alternatives, creating pockets of rich, fudgy goodness in every bite.
The dough requires just 10 minutes of prep, followed by 12 minutes in the oven, making it ideal for weeknight cravings or holiday baking. For extra insurance, I recommend chilling the dough for 30 minutes—this ensures thicker cookies with those coveted crispy edges.
By the time they emerge from the oven, you’ll have golden-brown cookies with caramelized edges and centers that remain soft enough to melt on your tongue. The aroma alone will have everyone gathering in the kitchen, and the texture—crunchy yet tender—is impossible to resist.
These cookies freeze beautifully too, so you can bake a batch ahead and enjoy them all season long.
For variations, try swapping in white chocolate chips or adding a pinch of sea salt to enhance the chocolate flavor. The recipe also works with almond flour for a gluten-free option, though texture may vary slightly. Let’s get baking—your kitchen will smell like heaven in no time.
Ingredients for hershey chocolate chip
Ten ingredients. One perfect batch of cookies with crispy edges and gooey centers.
| Ingredient | Amount | Notes |
|---|---|---|
| Unsalted Butter 🧈 | 1 cup | Softened to room temperature |
| Granulated Sugar 🍚 | ¾ cup | For crispy edges |
| Packed Brown Sugar 🍚 | ¾ cup | For chewy centers |
| Large Eggs 🥚 | 2 whole | Room temperature preferred |
| Vanilla Extract 🍯 | 2 tsp | Pure extract for depth |
| All-Purpose Flour 🌾 | 2 ½ cups | Sifted for light texture |
| Baking Soda 🧂 | 1 tsp | Ensures rise |
| Diamond Crystal Kosher Salt 🧂 | 1 tsp | Fine grain preferred |
| Hershey's Chocolate Chips 🍫 | 2 cups | Original milk chocolate |
| Flaky Sea Salt 🧂 | ½ tsp | For finishing (optional) |
The butter is non-negotiable—unsalted, room temperature for even mixing. I always grab Land O'Lakes or Plugrá from the dairy case, not the tubs. The Hershey's chocolate chips are the star here, so buy the 12-ounce bag—it's worth the few extra cents for that classic milk chocolate flavor. Brown sugar matters too; Domino or C&H brands work perfectly. For the flour, King Arthur or Gold Medal are my go-tos—they bake consistently. Pro tip: measure your flour by spooning it into the cup and leveling, not scooping directly from the bag.
No vanilla extract? Vanilla bean paste works wonders, or even a scraped vanilla bean if you're feeling fancy. Short on chocolate chips? Chop a Hershey bar into chunks—they melt just as beautifully. Want to go gluten-free? Swap the all-purpose flour for almond flour or a 1:1 gluten-free blend, though texture will be slightly denser. For a salty twist, add flaky Maldon salt to the dough or sprinkle it on top after baking. The baking soda and salt are simple but critical—don't skip measuring them precisely.
This dough chills beautifully, so make it a day ahead for thicker cookies. Store wrapped in the fridge for up to 5 days or freeze portions for 3 months. Once baked, keep cookies in an airtight container with parchment between layers to maintain crispness. They reheat perfectly—just 5 seconds in the microwave to revive that warm, gooey center. Double the batch and freeze half for lazy days when you crave fresh-baked cookies without the effort.
Why You'll Love This Recipe
- No Mixer Needed: I swear by this—just creaming butter and sugars with my hands (or a wooden spoon) until it lightens up. That butter-egg magic? It’s the secret to those airy pockets, and honestly, it’s easier than scraping out a stand mixer.
- Rich, Classic Taste: The Hershey’s chips melt into gooey pools while the brown sugar caramelizes just enough to give every bite that deep, nostalgic flavor. Between us, it’s the kind of cookie that makes you question why you ever bought store-bought.
- Freezer-Friendly Bliss: Bake a batch, let them cool, and stash them in a bag—they’ll stay fresh for weeks. I always keep a stash for last-minute gifts or when I’m too tired to bake. (Yes, even on a Tuesday night.)
- Budget Baked Magic: Five ingredients, zero specialty items—this is the recipe that proves you don’t need fancy tools or expensive chocolate to make something ridiculously good. The eggs and butter do all the heavy lifting, and your wallet stays happy.
Step-by-step instructions for Hershey chocolate chip cookies
Here's the method that guarantees perfect Hershey chocolate chip cookies every time—crisp edges, chewy centers, and melty chocolate pockets.
Cream the Butter and Sugars to a Light, Fluffy Texture
In a stand mixer fitted with the paddle attachment, combine the 1 cup of unsalted butter, 0.75 cup of granulated sugar, and 0.75 cup of packed brown sugar. Beat on medium speed for 3-4 minutes until the mixture is pale, fluffy, and nearly doubles in volume. You'll know it's ready when it leaves a ribbon-like trail when the beaters are lifted.
This creaming process incorporates air, which creates those signature crackly tops and helps develop the perfect texture. If you're mixing by hand, use a sturdy bowl and your arm muscles—it takes about 5 minutes of vigorous beating. The butter should be softened but not melted; if it's too warm, chill the mixture for 15 minutes before proceeding.
Incorporate Eggs and Vanilla for Rich Flavor
Add the 2 whole large eggs, one at a time, mixing on low speed after each addition until fully combined. Then add the 2 teaspoons of vanilla extract and mix for another 10 seconds. The mixture will look slightly curdled, but that's normal—the flour will smooth everything out in the next step.
I always use room-temperature eggs for better emulsification. If yours are cold, let them sit in warm water for 5 minutes before adding. This step ensures the cookies have that rich, custard-like quality that makes them irresistible. Don't skip the vanilla—it adds depth that plain extract can't match.
Combine Dry Ingredients and Fold in Chocolate
In a separate bowl, whisk together the 2.5 cups of all-purpose flour, 1 teaspoon of baking soda, and 1 teaspoon of diamond crystal kosher salt. With the mixer on low speed, gradually add the dry ingredients to the wet mixture, mixing just until combined—about 30 seconds. You should still see some flour streaks, but the dough should hold together when pressed.
Remove the bowl from the mixer and fold in the 2 cups of Hershey's chocolate chips using a silicone spatula. Be gentle to avoid melting the chocolate prematurely. If you're using a mix of milk and dark chocolate, distribute them evenly throughout the dough. This ensures each bite has that perfect balance of sweetness and richness.
Chill the Dough for Better Texture
Cover the dough bowl with plastic wrap and refrigerate for at least 30 minutes, or up to 24 hours. Chilling is non-negotiable—it prevents the cookies from spreading too thin in the oven and allows the flour to fully hydrate, resulting in a lighter, chewier texture.
Cold dough also means the cookies hold their shape better when they hit the hot oven, giving you those thick, bakery-style cookies with crisp edges. If you're short on time, even 20 minutes in the freezer works in a pinch. Just make sure the dough is firm and cold before scooping.
Bake to Golden Perfection
Preheat your oven to 350°F and line two baking sheets with parchment paper. Using a cookie scoop or tablespoon, drop the chilled dough onto the sheets, spacing them 3 inches apart—they'll spread. For classic Hershey-style cookies, I like to flatten each scoop slightly with my finger to create that signature thick-and-thin shape.
Bake for 11-13 minutes until the edges are golden brown but the centers still look slightly underdone. They'll continue cooking on the hot pan after you remove them. Let them cool on the baking sheet for 5 minutes before transferring to a wire rack. For extra crunch, sprinkle with the 0.5 teaspoon of flaky sea salt while they're still warm.
Pro Tips For Making Hershey Chocolate Chip
- Melt Butter Slowly: I learned this the hard way—dumping cold butter into the mix and ending up with streaks of unmelted fat. Instead, warm the butter in the microwave for 20-30 seconds (just until soft) before mixing it with the sugars. This ensures everything blends smoothly from the start, no lumps or greasy surprises.
- Measure Brown Sugar Right: Packed brown sugar isn’t just a detail—it’s the difference between a cake that falls apart and one that holds its shape. Use a spoon to press it firmly into the measuring cup, then level it off. Skip this, and your batter will be too thin, leading to a dense, dry result.
- Avoid Overmixing Eggs: Once the eggs and sugars are combined, mix just until the batter looks uniform—about 20-30 seconds. Overmixing introduces too much air, which can cause the cake to sink in the middle or develop a tough texture. I know, it’s tempting to get it "perfect," but less is more here.
- Use Room-Temp Eggs: Cold eggs can make your batter lumpy and uneven. Take the eggs out of the fridge 30 minutes before mixing, or run them under warm water for a minute. The batter will come together smoother, and the texture will be lighter—trust me, your cake will thank you.
Regional styles of hershey chocolate chip
Midwest Homestyle
In the Midwest, these cookies take on a heartier, slightly thicker profile, often with a touch more brown sugar to balance the buttery richness. Locals like to add ½ cup chopped walnuts or pecans alongside the Hershey chips for texture contrast.
I’ve seen variations where 1 teaspoon cinnamon is folded into the dough—just enough to evoke warm spice without overpowering the chocolate. The key here is baking them at 325°F instead of 350°F for 14-16 minutes, yielding a softer, cake-like center that’s perfect with a glass of cold milk. 🌾
Southern Buttery Twist
Southern bakers often enhance the classic recipe with a ¼ cup of melted butter mixed into the chocolate chips before folding them into the dough. This creates pockets of extra gooey chocolate that melt dramatically in your mouth.
A pinch of cayenne pepper (⅛ teaspoon) adds a subtle heat that balances the sweetness—trust me, it’s a game-changer. For serving, Southerners typically dust the warm cookies with powdered sugar and serve them with a scoop of vanilla ice cream.
The lower humidity in the South means you can bake these at 375°F for 10-12 minutes for a crispier exterior. 🍯
Pacific Northwest Crunch
Out West, the focus shifts to texture with a toasted coconut flake topping—sprinkle ¼ cup unsweetened coconut flakes over the dough before baking. The cool, damp climate here means the cookies spread less, so I recommend underbaking them by 1 minute to keep the centers ultra-soft.
Pacific Northwest bakers also love adding raspberry jam swirls—fold 2 tablespoons raspberry jam into the dough for bursts of tartness. Pair these with a cup of chai tea for the ultimate cozy treat. 🌲
Northeast Salted Caramel
The Northeast puts its own spin with a salted caramel drizzle—after baking, drizzle the warm cookies with ¼ cup store-bought caramel sauce (like Trader Joe’s) and sprinkle with flaky sea salt.
This variation is a staple in New England bakeries, where the salty-sweet contrast is a match made in heaven. For a local touch, some bakers add 1 teaspoon maple syrup to the dough, giving it a subtle autumnal flavor.
The coastal air means these cookies stay crisp longer, so bake them at 350°F for 12-14 minutes for that perfect balance. ❄️
Southwest Spiced Version
In the Southwest, these cookies get a warm, aromatic twist with ½ teaspoon ground cumin and ¼ teaspoon smoked paprika folded into the dough. The spices complement the chocolate beautifully, adding earthy depth.
For a festive touch, swap half the Hershey chips for white chocolate chips and add chopped dried chiles (like ancho or pasilla) for a subtle kick. Serve with a cup of spiced chai or Mexican hot chocolate for the ultimate comfort combo.
The dry heat here means these cookies hold their shape well, so bake at 350°F for 11-13 minutes. 🌶️
West Coast Vegan Adaptation
California bakers have perfected a vegan version using Earth Balance vegan butter and flax eggs (1 tablespoon ground flaxseed + 3 tablespoons water per egg). The Hershey chips stay the star, but the dough benefits from ½ cup almond flour for structure.
For extra richness, fold in ¼ cup vegan white chocolate chips. These cookies bake at 350°F for 13-15 minutes**, yielding a slightly denser but still chewy texture. Pair with almond milk and enjoy the guilt-free indulgence. 🌱
Nutrition facts
Frequently asked questions
Can I substitute Hershey chocolate chips for store-brand chips?
While store-brand chips will work, Hershey's original milk chocolate has a slightly smoother texture and melts more evenly, creating those signature gooey pockets. For best results, stick with the brand—it's worth the small difference in quality. If you must substitute, look for chips labeled "premium" or "gourmet" for a closer texture.
Why did my cookies spread too much?
Over-spreading usually happens when the dough isn't chilled long enough or the butter is too soft. Always refrigerate the dough for at least 30 minutes (or up to 24 hours) before baking. Also, ensure your butter is softened but not melted—it should hold its shape when pressed. For thicker cookies, flatten the dough balls slightly before baking.
How do I make these cookies gluten-free?
Replace the all-purpose flour with a 1:1 gluten-free baking flour blend (like Bob's Red Mill or King Arthur). For best results, add ½ teaspoon xanthan gum to help bind the dough. The texture will be slightly denser, but they'll still be delicious. You may also need to reduce the baking time by 1-2 minutes to prevent over-browning.
Can I bake these cookies ahead of time?
Bake the cookies up to 3 days ahead and store them in an airtight container with parchment paper between layers. For longer storage, freeze the baked cookies (without cooling first) for up to 3 months. Reheat in the microwave for 5-10 seconds to revive that warm, gooey center.
What’s the secret to crispy edges and chewy centers?
The magic lies in the sugar ratio: use equal parts granulated and brown sugar, and bake at 350°F for 11-13 minutes until edges are golden but centers still look soft. The brown sugar keeps the middle chewy, while the granulated sugar helps crisp the edges. Also, chill the dough—this prevents excessive spreading and ensures even baking.