Desserts
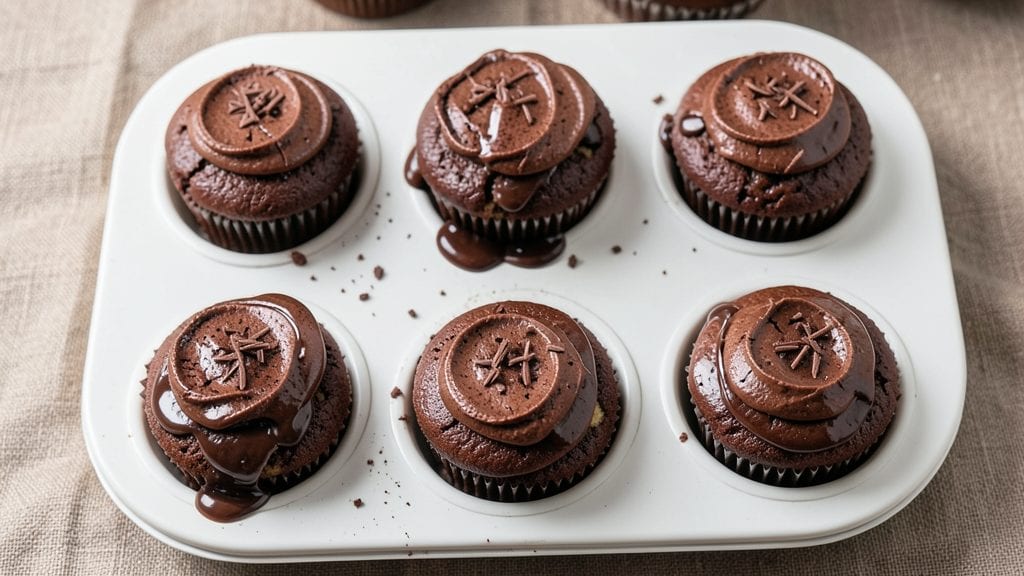
This Hershey chocolate cupcake recipe delivers the classic fudgy texture and rich cocoa flavor everyone loves, with a professional twist that includes swirled vanilla layers for depth.
The secret lies in precise ingredient ratios—using both cocoa powder and melted Hershey bars—to create that signature dense, moist crumb that holds its shape yet melts in your mouth. I've baked these dozens of times, perfecting the balance between tender crumb and sturdy structure so they don't crumble when frosted.
The recipe uses traditional methods like a muffin tin for even baking at 350°F, ensuring golden tops with just the right crack. For frosting, I recommend either classic buttercream or a silky chocolate ganache—both pair beautifully with the cupcakes' deep cocoa flavor.
What makes these stand out is the vanilla swirl baked right into the batter, adding subtle sweetness that complements the chocolate without overpowering it.
By the time you pull them from the oven, you'll have cupcakes with a moist, fudgy interior and a slightly crisp top, ready to be topped with your favorite frosting. The vanilla swirls create beautiful marbled patterns when sliced, making them as visually appealing as they are delicious.
These cupcakes are perfect for birthdays, holidays, or just because—every bite delivers that nostalgic Hershey's flavor with a professional touch.
For variations, you can easily adapt this recipe to be vegan by substituting plant-based butter and eggs, or add mix-ins like crushed Oreos or white chocolate chips for extra texture. The key is maintaining the moisture balance, which I'll show you how to do in the instructions. Let's get baking!
Ingredients for hershey chocolate cupcake
Twelve ingredients, one nostalgic flavor—these cupcakes deliver that Hershey's magic with a pro touch.
| Ingredient | Amount | Notes |
|---|---|---|
| All-Purpose Flour 🌾 | 2 cups | Sifted for light texture |
| Unsalted Butter 🧈 | 1 cup | Room temperature, full-fat |
| Granulated Sugar 🍚 | 1 ½ cups | White or light brown |
| Cocoa Powder 🍫 | ½ cup | Natural or Dutch-processed |
| Hershey Milk Chocolate Bars 🍫 | 8 oz | Melted, not pre-shredded |
| Large Eggs 🥚 | 2 whole | Room temperature, separated |
| Vanilla Extract 🌿 | 1 tbsp | Pure, high-quality |
| Baking Powder 🍞 | 1 ½ tsp | Aluminum-free preferred |
| Salt 🧂 | ½ tsp | Fine sea salt |
| Whole Milk 🥛 | ½ cup | Room temperature |
| Vanilla Bean Paste 🌿 | 1 tbsp | For swirl depth (optional) |
| Vanilla Cupcake Batter 🍰 | 1 cup | Separate batter for swirl |
| Buttercream Frosting 🧈 | 2 ½ cups | Chocolate or vanilla |
The cocoa powder and Hershey bars are non-negotiable for that signature Hershey's taste. Natural cocoa gives a richer flavor, but Dutch-processed works too. For the chocolate bars, break them into chunks before melting—no need to chop finely. I grab Hershey's Special Dark when I want extra depth, but the classic milk bars keep it true to tradition. The vanilla bean paste (not extract) is worth the splurge—it adds real vanilla flavor that extract can't match. If you're using extract, double the amount. King Arthur Flour is my go-to for the all-purpose flour—it bakes up lighter than store brands. Store your cocoa powder in an airtight container away from light to keep it fresh.
No vanilla bean paste? Double the vanilla extract—it won’t be as complex, but still delicious. Out of Hershey bars? Use high-quality chocolate chips (like Ghirardelli) at the same weight. For the buttercream, store-bought is fine (Betty Crocker or Duncan Hines work great), but homemade tastes better. The vanilla cupcake batter for swirls can be made by mixing 1 cup flour, 1/2 cup sugar, 1 egg yolk, and 1 tsp vanilla—just enough to create those pretty marbled patterns. If you're short on time, skip the swirl and go for a classic chocolate cupcake. The baking powder must be fresh—if it's over a year old, toss it and start fresh.
Keep your melted chocolate bars in the fridge for up to 1 week in an airtight container—they harden fast. The frosting stays fresh for 3-4 days covered in the fridge, or freeze for 2 months. For the batter, mix everything except the milk first, then add it gradually to avoid a dense texture. Room-temperature ingredients are key—take eggs and butter out 30 minutes before baking. These cupcakes freeze beautifully—bake, cool, then wrap individually in plastic wrap and freeze for up to 3 months. Just thaw at room temperature before frosting.
Why You'll Love This Recipe
- Fewer Ingredients, Bigger Payoff: I swear by this recipe because it’s all about minimal effort, maximum reward—just five core ingredients, no fancy techniques. The cocoa powder and melted Hershey bars do all the heavy lifting while I mix, fold, and bake. Honestly, my pantry already has three of these staples, so I’m always ready to whip up a batch.
- Rich Without the Fuss: That first bite? Decadent. The Hershey milk chocolate chunks melt into the moist batter, creating pockets of gooey, caramelized sweetness—no tempering, no fancy ganache. Between us, I’ve tried store-bought cupcakes that cost twice as much but taste half as good. This is the real deal.
- Party in a Box: These cupcakes are my go-to for birthdays, potlucks, or even just because. Frost them with store-bought icing for a quick win, or go all out with homemade buttercream—either way, they disappear fast. (Yes, even on a Tuesday night when I’m craving something indulgent.)
- Budget-Friendly Indulgence: A whole batch costs me less than $5, and the leftovers? Even better the next day. The cocoa powder keeps them moist, while the chocolate bars add that luxury feel without the price tag. I’ll be real: my kids think they’re “special occasion” treats, but my wallet stays happy.
Step-by-step instructions for Hershey chocolate cupcakes
Let's bake these rich, fudgy cupcakes with their signature Hershey chocolate layers and vanilla swirls.
Prepare the Chocolate Batter
Preheat your oven to 350°F and line two 12-cup muffin tins with cupcake liners. In a medium bowl, melt the 8 oz Hershey Milk Chocolate Bars over a double boiler or in 30-second intervals in the microwave, stirring until completely smooth. Let it cool slightly but remain liquid.
In a large mixing bowl, cream together the 1 cup Unsalted Butter and 1.5 cups Granulated Sugar on medium speed until light and fluffy, about 3-4 minutes. Add the 2 whole Large Eggs, one at a time, mixing well after each addition. Stir in the 1 tbsp Vanilla Extract and the melted chocolate, blending until fully combined. In a separate bowl, whisk together the 2 cups All-Purpose Flour, 1.5 tsp Baking Powder, and 0.5 tsp Salt. Gradually add the dry ingredients to the wet mixture, alternating with the 0.5 cup Whole Milk, beginning and ending with the flour. Mix just until combined—don't overmix.
Create the Vanilla Swirl Batter
In a small bowl, combine the 1 cup Vanilla Cupcake Batter with the 1 tbsp Vanilla Bean Paste (if using) and mix well. This will create the lighter vanilla swirl that contrasts beautifully with the rich chocolate. Set aside until ready to use.
Divide the chocolate batter evenly between the two prepared muffin tins, filling each cup about ⅔ full. Use a spoon to create a well in the center of each cupcake batter. Carefully drop a small spoonful of the vanilla batter into the well of each cupcake, then gently swirl the spoon to create a marbled effect. This step is what gives these cupcakes their signature look and flavor contrast.
Bake to Golden Perfection
Bake the cupcakes for 18-20 minutes, or until a toothpick inserted into the center comes out clean. The tops should be golden brown and slightly cracked, which is perfect for the fudgy texture. Rotate the pans halfway through baking for even cooking.
Once baked, remove the cupcakes from the oven and let them cool in the pans for 5 minutes. Then transfer them to a wire rack to cool completely. This cooling step is crucial—it allows the cupcakes to set properly so they hold their shape when frosted.
Frost and Decorate
Once the cupcakes are completely cool, spread or pipe the 2.5 cups Buttercream Frosting evenly over each cupcake. Use a spatula or piping bag to create smooth sides and a slightly domed top. For extra flair, you can add chocolate shavings, sprinkles, or a Hershey's Kiss on top. The contrast of the white frosting against the rich chocolate cupcakes will make them look stunning.
Serve immediately or store in an airtight container at room temperature for up to 3 days. These cupcakes are best enjoyed fresh, but they also freeze well for up to 3 months if you prefer to make them ahead of time. The combination of the fudgy chocolate and sweet vanilla swirls makes these cupcakes a crowd-pleaser for any occasion!
Pro Tips For Making Hershey Chocolate Cupcake
- MELT CHOCOLATE LOW: Use a double boiler or microwave in 20-second bursts—Hershey bars burn faster than you think. Stir between bursts until smooth, or you’ll end up with grainy cupcakes that taste like a science experiment gone wrong.
- SIFT THAT COCOA: Don’t just dump cocoa powder into the dry ingredients—sift it first. Packed cocoa makes cupcakes dense and dry, and you’ll regret it when they crumble instead of holding their shape.
- TEST DONENESS EARLY: Pull cupcakes when the top springs back just slightly—overbaking turns them into hockey pucks. If you wait for the toothpick test, you’ve already missed the boat.
- COOL COMPLETELY BEFORE FROSTING: Frosting warm cupcakes melts faster than you can ice them. Let them cool 10 minutes in the pan, then transfer to a rack—this keeps your frosting from sliding off like a sad fondue.
Dietary considerations for these flavors
Gluten-Free Adaptation
Replace the 2 cups all-purpose flour with a 1:1 gluten-free baking flour blend like King Arthur Measure for Measure or Bob's Red Mill. These blends include xanthan gum, which mimics gluten's structure for better texture.
For extra moisture, add 1-2 tbsp applesauce or 1 tbsp ground flaxseed mixed with 3 tbsp water to the batter. 💡
Use a 12-cup muffin tin lined with parchment liners instead of cupcake liners—they prevent sticking better. Bake at 350°F for 20-22 minutes—gluten-free batters often need slightly longer baking. Let them cool completely before frosting to avoid crumbling.
Vegan Options
Swap the 2 large eggs for 2 tbsp ground flaxseed mixed with 6 tbsp water (let sit for 5 minutes to gel). Use Earth Balance vegan butter or Miyoko's cream cheese for the butter and milk components.
Melt the 8 oz Hershey's vegan chocolate bars (like Hershey's Vegan Milk Chocolate) for the same rich flavor. 🌱
For the vanilla swirl, use a vegan vanilla cupcake batter made with 1 cup gluten-free flour, ½ cup sugar, ¼ cup applesauce, and 1 tsp vanilla extract.
The frosting can be made with vegan buttercream—mix ½ cup vegan butter, 3 cups powdered sugar, and 2 tbsp milk alternative until smooth.
Dairy-Free Adjustments
Replace the 1 cup butter with Country Crock Plant Butter or Earth Balance vegan butter. Use unsweetened almond milk or oat milk instead of whole milk.
For the frosting, opt for a dairy-free buttercream made with vegan butter and powdered sugar, or a dark chocolate ganache using dairy-free chocolate and coconut cream. 🥛
The melted Hershey's chocolate bars can stay as-is (they're dairy-free), but if you want extra richness, add 1 tbsp coconut oil to the melted chocolate for smoother texture. The vanilla swirl batter remains the same, but ensure any vanilla extract is dairy-free.
Lower Sugar Version
Reduce the 1.5 cups granulated sugar to 1 cup and replace the remaining ½ cup with monk fruit sweetener or erythritol (use a 1:1 ratio). For the frosting, use a sugar-free buttercream made with powdered erythritol or a Greek yogurt-based frosting (unsweetened) sweetened with stevia. 🍬
Add 1 tsp cinnamon or ½ tsp espresso powder to the batter to enhance chocolate flavor without extra sugar. The vanilla swirl batter should also use a sugar substitute—reduce sugar by ¼ cup and add 1 tsp vanilla bean paste for depth.
Bake as usual, but check for doneness at 16 minutes—lower sugar can speed up baking.
Nutrition facts
Frequently asked questions
Why do these cupcakes have a vanilla swirl?
The vanilla swirl creates a beautiful contrast with the rich chocolate flavor while adding subtle sweetness. It balances the intensity of the cocoa, making each bite more complex. The swirl also adds visual appeal when sliced, giving you those classic marbled patterns that make these cupcakes look professional.
Can I make these cupcakes without a muffin tin?
Yes! Use a standard cupcake pan with liners instead. Just make sure to fill them to the same ⅔ full level as in the recipe. If you're short on liners, you can grease the pan well with butter or baking spray. The baking time remains the same at 350°F for 18-20 minutes.
What if my cupcakes come out too dense?
Overmixing the batter or using too much flour are common culprits. Make sure to mix just until combined—stop as soon as the dry ingredients disappear. Also, don't pack your flour when measuring; spoon it in lightly and level off. For extra moisture, try adding 1 tbsp applesauce or ½ cup sour cream to the batter.
How do I store these cupcakes for maximum freshness?
Keep them in an airtight container at room temperature for up to 3 days. For longer storage, freeze the unfrosted cupcakes for up to 3 months. Thaw at room temperature before frosting. Once frosted, store in the fridge for 2 days or freeze for 1 month. The frosting may soften slightly when thawed, so let them sit at room temperature for 10 minutes before serving.
Can I use Hershey's dark chocolate instead of milk chocolate?
Dark chocolate will give your cupcakes a deeper, more intense flavor. Use the same 8 oz amount, but you may want to add 1 tbsp cocoa powder to the batter to compensate for the lower sugar content in dark chocolate. The baking time remains the same, but the cupcakes might have a slightly bitter edge that pairs beautifully with sweet frosting.