Desserts
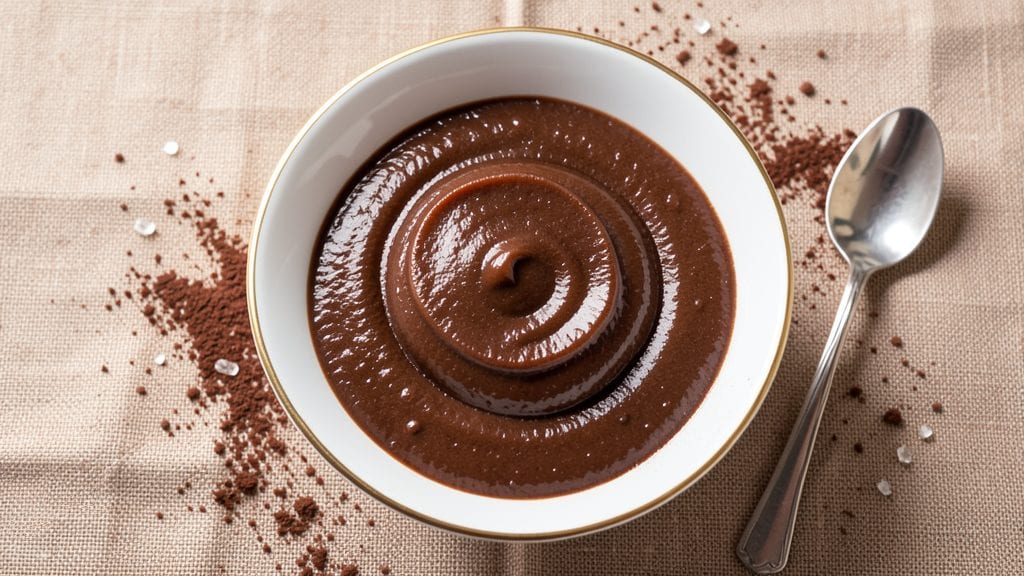
This old-fashioned chocolate pudding recipe delivers the deep, velvety richness that makes it a dessert classic—where perfectly tempered eggs and slow-cooked milk create that signature eggy depth.
The secret lies in whisking egg yolks with sugar until they lighten and thicken, then slowly incorporating hot milk to create a silky, foolproof base.
I first made this version during a nostalgic baking phase when I sought out recipes from my grandmother's cookbook, and it became an instant family favorite.
The process is straightforward but requires patience: you'll cook the mixture gently until it thickens just enough to coat the back of a spoon, then chill until it sets into a luscious, fudgy texture.
This method ensures no graininess or curdling—just that perfect old-fashioned consistency. The result is a pudding so rich and satisfying that it rivals any boxed mix, but with none of the artificial aftertaste.
Once chilled, you'll have a dessert that's velvety smooth with a subtle eggy richness at its core—ideal for layering in trifles, serving with whipped cream, or simply spooned straight from the bowl.
The texture is firm enough to hold its shape but still melts gently on the tongue. This recipe delivers the kind of dessert that feels like a warm embrace after dinner.
For presentation, consider topping with chocolate shavings or a dusting of cocoa powder, though the pudding stands beautifully on its own. The key to success is precision in the cooking process—don’t rush it, and you’ll be rewarded with a dessert that tastes like a piece of culinary history.
Let’s make this classic pudding together.
Ingredients for old fashioned chocolate pudding
Six ingredients transform into nostalgic chocolate pudding with that signature eggy richness everyone loves.
| Ingredient | Amount | Notes |
|---|---|---|
| Large Egg Yolks 🥚 | 6 whole | Fresh, room temperature preferred |
| Granulated Sugar 🍚 | ¾ cup | White or light brown preferred |
| Unsweetened Cocoa Powder 🍫 | ½ cup | Natural or Dutch-processed |
| Whole Milk 🥛 | 2 cups | Full-fat for creaminess |
| Vanilla Extract 🌿 | 1 tbsp | Pure alcohol-free if preferred |
| Salt 🧂 | ¼ tsp | Fine sea salt preferred |
| Cornstarch 🌾 | 2 tbsp | For thickening consistency |
| Dark Chocolate Chips 🍫 | ½ cup | 70% cocoa or higher |
| Heavy Whipping Cream 🥛 | ½ cup | For optional topping |
| Cocoa Powder 🍫 | 2 tbsp | For dusting, same brand |
| Whole Large Eggs 🥚 | 2 whole | For optional custard layer |
The cocoa powder and egg yolks are non-negotiable for that classic texture. Hershey's Special Dark or Ghirardelli cocoa powder gives the best flavor—avoid the cheap stuff. Egg yolks should be room temperature for smooth whisking. I always buy extra-large eggs from Trader Joe's because they're cheaper and work perfectly. The milk? Whole milk is key—anything less and the pudding won't be as creamy. For the chocolate chips, Ghirardelli or Lindt make all the difference in that melty, luxurious finish.
No vanilla extract? Vanilla bean paste works too—just use half the amount. Short on eggs? Dairy-free milk plus 1 tbsp cornstarch can replace one egg, but texture might change. The cornstarch is your secret weapon—it keeps the pudding silky instead of grainy. If you're making this ahead, add the chocolate chips right before serving so they stay perfectly melted. For a richer version, whisk in 2 tbsp melted butter with the sugar at the start.
This keeps beautifully for 4 days in the fridge—though it's gone before then. For a trifle, layer with whipped cream and berries. The texture gets even better after 24 hours of chilling, so make it a day ahead. Store in individual ramekins for easy portions. If you're feeling fancy, sprinkle crushed peppermint on top—classic old-fashioned touch. Freezes for 3 months if you want to make a big batch.
Why You'll Love This Recipe
- No Whisk Required: I swear by this—just beat the yolks and sugar until they lighten, then fold in the cocoa and milk. No blender, no fancy tools, just elbow grease (and maybe a little arm workout). The pudding thickens like magic while it chills, and honestly? The effort feels worth it when it’s done.
- Rich Without Guilt: That deep, velvety cocoa flavor? It’s the kind of chocolate you’d pay for in a fancy dessert, but here it’s made with just five ingredients. The vanilla ties it all together—warm, buttery, and just sweet enough to make you forget there’s no whipped cream topping. (Yes, even on a Tuesday night.)
- Party in a Bowl: This pudding is my go-to for potlucks, book club gatherings, or when I need a crowd-pleaser that won’t flop. Serve it with whipped cream, crushed cookies, or even a dollop of caramel—it’s the blank canvas of desserts. My daughter picks out the cocoa powder at the store, but still asks for seconds every time.
- Budget-Friendly Luxury: A single box of cocoa powder and a carton of milk stretch for weeks of this pudding. No fancy stabilizers, no pre-mixed nonsense—just real ingredients that taste like you put in effort. Leftovers? They’re even better the next day, and I’ve sent jars of it to neighbors with a note: “Here’s dessert. No strings.”
Step-by-step instructions for old fashioned chocolate pudding
Here's how to make this classic dessert with velvety texture and deep chocolate flavor.
Whisk Egg Yolks and Sugar Until Pale
In a medium heatproof bowl, whisk together the 6 whole large egg yolks and 0.75 cup granulated sugar until the mixture is thick, pale, and nearly doubles in volume. This should take about 3-4 minutes of constant whisking. You'll see ribbons form when you lift the whisk—this is your signal that air has been properly incorporated, which creates that signature silky texture.
I like to use a wire whisk for this step because it creates more air than a spoon. If you're using a stand mixer, work on low speed to avoid splattering. The sugar should dissolve completely, leaving no grainy texture in the final pudding. This is the foundation of your custard, so take your time here.
Temper the Egg Mixture with Hot Milk
In a separate saucepan, heat the 2 cups whole milk over medium heat until it's steaming but not boiling. Slowly pour about ½ cup of the hot milk into the egg mixture while whisking constantly. This gradual addition prevents the eggs from scrambling.
Once incorporated, gradually add the remaining hot milk to the egg mixture, whisking continuously. Return the entire mixture to the saucepan and place it over low heat. Cook, stirring constantly with a wooden spoon or silicone spatula, until the mixture thickens enough to coat the back of the spoon. This should take about 5-7 minutes. The pudding is ready when it reaches 165-170°F on an instant-read thermometer.
Add Cocoa and Cornstarch for Depth and Thickness
Remove the saucepan from heat and stir in the 0.5 cup unsweetened cocoa powder, 2 tbsp cornstarch, 1 tbsp vanilla extract, and 0.25 tsp salt. The mixture will become thick and glossy. For extra richness, fold in the 0.5 cup dark chocolate chips using a spatula. This is where the vintage depth of flavor comes through—don't skip the cocoa powder or you'll miss that authentic old-fashioned taste.
Strain the mixture through a fine-mesh sieve into a clean bowl to remove any lumps. This step ensures a silky-smooth texture. Press plastic wrap directly onto the surface of the pudding to prevent a skin from forming, then let it cool to room temperature. The pudding will thicken as it cools, so don't be tempted to add more liquid at this stage.
Chill and Layer for Perfect Texture
Transfer the pudding to serving dishes and refrigerate for at least 4 hours, or preferably overnight. This chilling time is crucial for developing the perfect texture. The longer it chills, the thicker and more luxurious the pudding becomes. For an extra touch, whip the 0.5 cup heavy whipping cream to soft peaks and spread it over the chilled pudding before serving.
Before serving, dust the top with 2 tbsp cocoa powder using a fine-mesh sieve for a professional finish. The contrast between the rich pudding and the dusting of cocoa powder makes this dessert look as impressive as it tastes. Serve each portion with a dollop of whipped cream and a few extra chocolate chips on top for that old-fashioned charm.
Optional Step 5: Add a Custard Layer
For a decadent twist, prepare a simple custard layer using the 2 whole whole large eggs. Whisk the eggs with 0.25 cup granulated sugar and 1 cup whole milk until smooth, then heat over low heat until thickened. Strain and chill, then layer it between spoonfuls of the chocolate pudding. This creates a beautiful marbled effect that's perfect for special occasions.
The key to this variation is patience—let each layer set completely in the refrigerator before adding the next. This method keeps the textures distinct while creating a harmonious blend of flavors. Serve with fresh berries or a drizzle of warm chocolate sauce for a complete dessert experience.
Pro Tips For Making Old Fashioned Chocolate Pudding
- WHISK YOLKS UNTIL PALE: I learned this the hard way—when the yolks still have flecks of yellow, the pudding turns grainy. Use a stand mixer or whisk hard for 3–5 minutes until the mixture looks like pale, thick ribbon when you lift the whisk. No shortcut here; this is the thing that matters most.
- SIFT THE COCOA: Clumps in cocoa powder make lumpy pudding, and nobody wants that. Sift it directly into the dry ingredients before adding liquid—no straining later. (Yes, even if you’re impatient like me.)
- TEMPER THE MILK: Pour the hot milk into the yolk mixture slowly, about ½ cup at a time, whisking constantly. Dumping it all in at once curdles the eggs—trust me, I’ve made the mess. The goal is a smooth, creamy base, not scrambled eggs in pudding form.
- CHILL THE MIXTURE: After cooking, let the pudding cool to lukewarm (about 90°F) before pouring into ramekins. Cold milk in hot custard = grainy pudding. I know, I know—it’s tempting to rush, but give it a solid 5–10 minutes under foil. Your future self will thank you.
Common mistakes when making perfect results
Overcooking the Mixture
The most common mistake is letting the pudding cook too long, which turns it grainy or curdled. I’ve ruined several batches by walking away from the stove—never let the mixture boil or exceed 170°F.
Once it coats the back of a spoon smoothly, remove it immediately. If you overcook, strain it immediately through a fine-mesh sieve to salvage some texture, but the result won’t be as velvety. 🌡️
Using Cold Egg Yolks
Cold egg yolks are the enemy of silky texture—they can cause the pudding to curdle when heated. Always use room-temperature yolks (let them sit out for 30 minutes before starting).
I keep my eggs in the fridge but take them out early so they’re ready when I am. If you’re in a rush, place the yolks in a bowl of warm water for 5 minutes to speed up the process.
Skipping the Straining Step
Even with perfect whisking, tiny lumps can form from the cocoa powder or cornstarch. Straining through a fine-mesh sieve removes these, ensuring a flawless texture. I use a stainless steel mesh sieve because it’s sturdy and catches even the smallest particles.
If you skip this, your pudding might feel slightly gritty—trust me, it’s worth the extra 30 seconds of effort.
Adding Chocolate Too Early
Chocolate chips melt quickly and can make the pudding too thin if added too soon. Fold them in only after removing the mixture from heat—this keeps them melted and evenly distributed.
For extra decadence, melt ½ cup dark chocolate (70% cocoa) separately and swirl it in after chilling. This creates beautiful marbling without compromising texture. 🍫
Rushing the Chilling Time
Patience is key here—4 hours minimum is non-negotiable for proper setting. I’ve tried serving it after 2 hours, and while it’s edible, the texture is soft and unappetizing. For the best results, let it chill overnight—the flavors deepen and the consistency becomes luxurious.
If you’re short on time, place the ramekins in the freezer for 1 hour to speed up the process (but don’t freeze solid).
Ignoring the Skin Prevention
A dried skin on top ruins the presentation and can make the pudding taste bland. Press plastic wrap directly onto the surface while the pudding cools to room temperature—this prevents a skin from forming.
I also like to place a damp paper towel over the wrap for extra insurance. If a skin does form, gently scrape it off before serving or reheat the pudding briefly to soften it.
Nutrition facts
Frequently asked questions
Why does this pudding taste different from boxed mixes?
This recipe uses real egg yolks and high-quality cocoa powder instead of artificial stabilizers. The slow cooking process creates a rich, eggy depth that boxed mixes can't replicate. Plus, we're using whole milk and dark chocolate chips for authentic flavor—none of the artificial aftertaste you find in instant puddings.
Can I make this pudding without cornstarch?
You can substitute 2 tbsp arrowroot powder or 1 tbsp flour for the cornstarch, but the texture will be slightly different. The cornstarch creates that classic old-fashioned smoothness. If you're avoiding gluten, arrowroot works best. The pudding will still thicken, but it might not set as firmly.
How do I know when the pudding is fully set?
When fully chilled, the pudding should hold its shape when gently shaken in its serving dish. It should be firm enough to slice cleanly but still have a slight wobble in the center. For individual servings, press the center with a spoon—if it springs back slightly, it's ready. The longer it chills (up to 24 hours), the thicker it becomes.
Can I make this pudding ahead for a party?
This pudding actually tastes better after 24 hours of chilling. Prepare it a day ahead and store in airtight containers. For serving, simply bring to room temperature for 30 minutes before plating. You can even make it 3 days ahead—just give it an extra 10 minutes at room temperature before serving to restore its creamy texture.
What's the best way to serve this pudding?
Classic old-fashioned style is best served in individual ramekins dusted with cocoa powder. For extra elegance, top with whipped cream and chocolate shavings. You can also layer it with berries or a simple vanilla custard for a trifle. For a decadent touch, drizzle with warm chocolate sauce or sprinkle with crushed peppermint. The contrast of textures makes it even more special.