Desserts
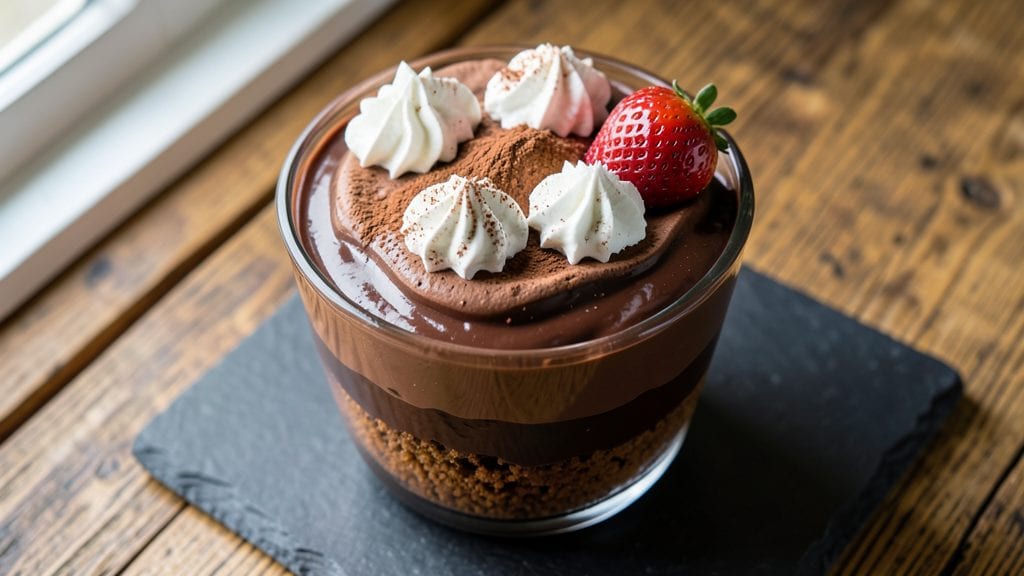
Transforming a simple chocolate cake mix into a decadent two-layer dessert with a gooey pudding center is the kind of shortcut that feels like cheating.
This recipe takes less than an hour from start to finish and delivers layers of rich chocolate cake separated by a velvety pudding filling that melts in every bite. The secret lies in precise timing and layering technique—no fancy equipment required.
What makes this dessert special is how it combines convenience with restaurant-quality results. You'll start with a boxed cake mix (no judgment here—we're elevating it), then build layers of flavor by adding a homemade chocolate pudding filling that stays perfectly gooey in the center.
The key is letting the cake cool completely before assembly, which prevents soggy layers and ensures clean cuts when serving.
By the time you're done, you'll have a showstopping dessert with crisp edges, moist cake layers, and that signature pudding center that makes it unforgettable.
The contrast between the firm cake and creamy pudding creates the perfect texture combination, while a dusting of powdered sugar or chocolate shavings adds that final touch of elegance. This is the kind of dessert that makes you look like a pro without spending hours in the kitchen.
Perfect for birthdays, date nights, or whenever you crave something sweet with minimal effort. The recipe scales easily for crowds, and leftovers keep well in the fridge for up to three days. Let's get baking!
Ingredients for chocolate cake mix with chocolate pudding
Box mix meets homemade pudding magic—just 13 ingredients for showstopping layers.
| Ingredient | Amount | Notes |
|---|---|---|
| Devil's Food Chocolate Cake Mix 🍫 | 2 boxes | Any quality brand (Betty Crocker, Duncan Hines) |
| Large Eggs 🥚 | 4 whole | Room temperature preferred |
| Unsalted Butter 🧈 | 1 cup | Melted, full-fat for richness |
| Whole Milk 🥛 | 1 cup | Full-fat for creaminess |
| Vegetable Oil 🫒 | 1/3 cup | Or substitute melted butter |
| Granulated Sugar 🍚 | 1 cup | For extra sweetness |
| Vanilla Extract 🌸 | 2 tsp | Pure, high-quality |
| Instant Chocolate Pudding Mix 🍫 | 1 box | Same brand as cake mix |
| Heavy Whipping Cream 🥛 | 1 cup | Cold for best texture |
| Powdered Sugar 🍚 | 2 tbsp | For dusting layers |
| Mini Chocolate Chips 🍫 | 1 cup | For cake mix |
| Unsweetened Cocoa Powder 🍫 | 2 tbsp | For pudding richness |
| Salt 🧂 | ¼ tsp | Kosher or sea salt |
The cake mix is your shortcut, but don't skimp on the extras. Betty Crocker or Duncan Hines work best here—their devil's food variety has the richest chocolate flavor. I always grab the Betty Crocker Super Moist if I'm near Costco—it's a game changer. The key is adding the mini chocolate chips and extra cocoa powder to the mix (not the dry ingredients) for that restaurant-quality texture. For the pudding, Jell-O chocolate pudding mix is my go-to—it's the most reliable for that perfect gooey consistency. If you're using a different brand, check the box for cooking times, since some take longer to thicken.
No cake mix? Homemade chocolate cake batter works too—just scale the ingredients. Short on chocolate chips? Melted chocolate bars (like Ghirardelli) poured over the layers adds richness. The pudding mix can be swapped for homemade chocolate pudding (mix 1/2 cup cocoa, 1/4 cup sugar, 2 tbsp cornstarch, 2 cups milk, 2 tbsp butter), but the boxed version is foolproof. For extra decadence, fold in 1/2 cup whipped cream to the pudding before assembling. And trust me on the full-fat cream—it makes all the difference in that velvety texture. If you're in a pinch, half-and-half works, but it won't be as rich.
Assemble the cake layers and pudding filling the morning of—it gives the flavors time to meld. Store the assembled cake in the fridge for up to 3 days, covered tightly. For serving, let it sit at room temperature for 20 minutes first—the pudding will be more spreadable. The cake layers keep well for 2 days separately if you want to prep ahead, but I find the pudding loses its perfect consistency if made too early. If you're making this for a crowd, double the pudding mix—you'll want extra for those second helpings.
Why You'll Love This Recipe
- No Mix-Up Moments: I swear by this recipe because it’s the closest thing to a no-fail dessert. You’re basically just folding pudding into cake batter—no fancy techniques, no measuring cups that disappear mid-recipe. The cake mix handles all the heavy lifting while the pudding adds that silky, melt-in-your-mouth richness without extra fuss.
- Double Chocolate Bliss: Honestly, the flavor is what keeps me coming back. That first bite? Fudgy, dense, and packed with chocolate in every layer—thanks to the cake mix and the pudding swirled right in. It’s not just "chocolate cake," it’s ridiculously chocolate cake, and my picky 10-year-old devours it faster than I can slice it.
- Birthday Party Hack: Between us, this is my go-to for last-minute celebrations. You can bake it in a sheet pan for easy serving, or even make it ahead and reheat slices in the oven—no one will know it’s not homemade. (Yes, even on a Tuesday night when you forgot to order a cake.)
- Budget-Friendly Indulgence: Here’s what sold me—the ingredients cost less than takeout, but it tastes like a bakery treat. A boxed mix, a few eggs, butter, and milk? That’s it. Plus, leftovers reheat beautifully, so you’re basically getting two desserts for the price of one. My wallet and my taste buds win.
Step-by-step instructions for chocolate cake mix with chocolate pudding
This decadent dessert comes together effortlessly with just a few key techniques.
Prepare the Cake Layers
Preheat your oven to 350°F and grease two 9-inch round cake pans with nonstick spray or butter. Line the bottoms with parchment paper circles for easy removal. In a large bowl, combine 2 boxes devil's food chocolate cake mix, 1 cup whole milk, 1/3 cup vegetable oil, 2 whole large eggs, and 2 teaspoons vanilla extract. Mix on medium speed with an electric mixer for 2 minutes until smooth and fully incorporated.
Fold in 1 cup mini chocolate chips using a spatula until evenly distributed. Divide the batter evenly between the prepared pans. Bake for 25-30 minutes or until a toothpick inserted in the center comes out clean. Let the layers cool in the pans for 10 minutes, then transfer to a wire rack to cool completely. This cooling step prevents the cake from becoming soggy when assembling.
Make the Chocolate Pudding Filling
In a medium bowl, whisk together 1 box instant chocolate pudding mix, 1 cup cold heavy whipping cream, and 2 tablespoons unsweetened cocoa powder. Add 1/4 teaspoon salt and mix until smooth. Let the mixture sit for 5 minutes to thicken slightly. This resting time ensures the pudding reaches the perfect consistency for that signature gooey middle.
While the pudding thickens, whip 1 cup heavy whipping cream with 2 tablespoons powdered sugar until soft peaks form. Gently fold the whipped cream into the pudding mixture until fully combined. The pudding should be thick but still spreadable—if it's too stiff, let it sit for another 2-3 minutes at room temperature.
Assemble the Layers
Place the first cake layer on a serving plate. Spread half of the chocolate pudding mixture evenly over the top, leaving a small border around the edges. This layering technique ensures every bite has that perfect balance of cake and pudding. Top with the second cake layer, pressing down gently to create a clean edge.
Spread the remaining pudding mixture over the top layer, creating a smooth, even surface. Dust the entire cake with powdered sugar for a professional finish. Chill in the refrigerator for at least 4 hours (or overnight) to allow the layers to set and the flavors to meld. The longer it chills, the more pronounced the chocolate flavor becomes.
Serve and Enjoy
Slice the cake into 8 equal wedges using a sharp serrated knife. For cleaner cuts, dip the knife in hot water and wipe it dry between slices. Serve each piece directly from the cake plate so guests can see the beautiful layers and gooey pudding oozing out with every bite.
This dessert keeps well in the refrigerator for up to 3 days, though I promise it won't last that long. The contrast between the moist cake, rich pudding, and sweet whipped cream layers makes this a showstopper for any occasion. Garnish with fresh berries or extra chocolate shavings if you want to take it to the next level.
Pro Tips For Making Chocolate Cake Mix With Chocolate Pudding
- Melt Butter Slowly: DESCRIPTION: I learned this the hard way—dumping cold butter into hot milk makes lumps that ruin the batter’s silkiness. Instead, cut the butter into small cubes and let it warm in the milk for 2-3 minutes before mixing. The butter will melt just enough to blend smoothly, and your cake won’t end up greasy or grainy.
- Room-Temp Eggs Only: DESCRIPTION: Cold eggs? Skip it. The batter will thicken unevenly, and your cake might sink in the middle. Crack eggs into a bowl, let them sit for 10 minutes at room temp, then whisk them thoroughly—no streaks. This isn’t the prettiest method, but it’s the tastiest.
- Don’t Overmix the Pudding: DESCRIPTION: Stirring the pudding mix into the cake batter until it’s perfectly smooth is tempting, but it makes the texture dense. Mix just until combined—lumps disappear in baking. I was skeptical until I tried it: the result is lighter, with pockets of that classic pudding swirl you crave.
- Grease Pan and Line It: DESCRIPTION: Grease the pan with oil, then line it with parchment paper cut to fit. The oil prevents sticking, but the parchment makes removing the cake effortless—no crumbling edges. Sounds weird, but it works: your cake will slide out like a dream, even if you’re impatient like me.
Pro cooking tips for perfect results
Layering Like a Pro
Spread the pudding filling evenly between cake layers using an offset spatula—this helps create clean, even layers that prevent messy oozing. I like to leave a ½-inch border around the edges of each layer to maintain structure.
For extra precision, chill the cake layers for 10 minutes in the fridge before assembling—they’ll hold their shape better when you add the pudding. 💫
Pudding Consistency Secrets
The pudding should be thick but still spreadable—if it’s too stiff, let it sit at room temperature for 2-3 minutes to soften. I’ve found that using cold heavy cream (straight from the fridge) gives the best texture.
Avoid overmixing after adding the whipped cream, or you’ll deflate the air bubbles that create that light, airy quality. A quick test: If the pudding holds its shape when spooned, it’s ready.
Cake Cooling Critical
Never skip cooling the cake layers completely before assembling! I’ve made this mistake and ended up with soggy bottoms. Let the cakes cool in their pans for 10 minutes, then transfer to a wire rack to cool for at least 1 hour.
This ensures the layers stay crisp and hold their shape when you slice. Pro tip: Place the pans on a baking sheet to catch any drips during cooling.
Chilling for Perfection
Chilling the assembled cake for at least 4 hours (or overnight) is non-negotiable—this lets the flavors meld and the pudding set properly. I often make mine the night before so it’s ready to serve the next day.
If you’re short on time, refrigerate for 2 hours minimum, but expect slightly softer layers. The longer it chills, the more dramatic the flavor contrast becomes between the cake and pudding.
Clean Slices Every Time
For perfectly clean slices, use a sharp serrated knife and dip it in hot water between cuts. Wipe it dry with a paper towel after each dip to prevent the cake from sticking.
I also recommend using a long, thin knife (like a pullman knife) for larger cakes—it gives you more control. Serve directly from the cake plate so guests can see the beautiful layers and gooey pudding oozing out. 🍫
Make-Ahead Magic
You can assemble the cake up to 3 days ahead and store it in an airtight container in the fridge. The pudding actually improves in flavor over time, becoming richer. If you’re prepping for a party, I suggest making the cake layers and pudding separately, then assembling just before serving. This way, the cake stays fresh, and the pudding maintains its perfect texture. Bring to room temperature for 20 minutes** before serving for the best texture and flavor.
Nutrition facts
Frequently asked questions
Can I use a different type of cake mix?
Yes! While devil's food is ideal for its rich chocolate flavor, you can use other chocolate cake mixes like fudgy brownies mix or even moist vanilla mix (add 2 tbsp cocoa powder to the batter). The key is ensuring the cake holds its shape when sliced—avoid overly dense mixes that crumble easily. For best results, stick to 2 boxes of any chocolate variety to maintain the right texture balance.
How do I prevent soggy bottom layers?
This happens when the cake isn't fully cooled before adding pudding. Let the layers cool completely in their pans for 10 minutes, then transfer to a wire rack for at least 1 hour. For extra insurance, place the assembled cake in the fridge for 10 minutes before adding the top layer. Chilling the cake layers for 10 minutes in the freezer (wrapped tightly) also works in a pinch.
Can I make this dessert gluten-free?
Use a gluten-free chocolate cake mix (like Betty Crocker or King Arthur) and ensure your pudding mix is also gluten-free. For extra richness, replace 1/4 cup of the milk with gluten-free chocolate syrup in the cake batter. The texture will be slightly denser, but the flavor stays incredible. Always check labels—some boxed mixes contain hidden gluten.
What's the best way to store leftovers?
Wrap the entire cake tightly in plastic wrap, then place in an airtight container. Store in the fridge for up to 3 days. The pudding actually becomes richer over time, but the cake layers may dry out slightly. For longer storage, freeze individual slices (separated by parchment paper) for up to 1 month. Thaw at room temperature for 30 minutes before serving.
How do I make it vegan?
Replace the eggs with 4 tbsp flaxseed meal + 10 tbsp water (let sit for 5 minutes to thicken). Use coconut oil instead of butter/oil, and swap the heavy cream for coconut cream or a vegan whipped topping. For the pudding, use a vegan chocolate pudding mix or make your own with silken tofu, cocoa powder, and maple syrup. The texture will be slightly different but still delicious!