Beverages
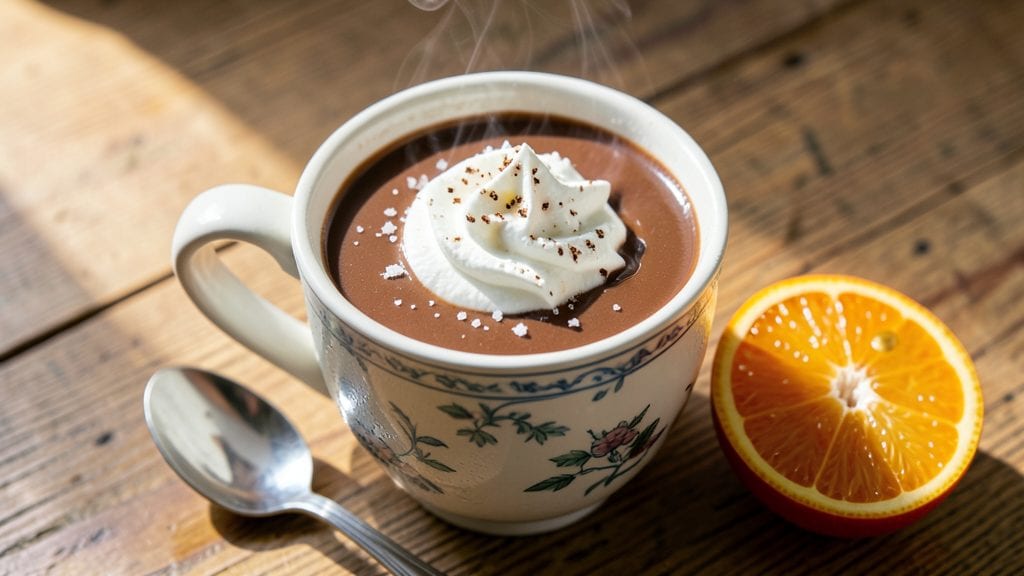
This Nestlé cocoa powder hot chocolate recipe delivers ultra-smooth, velvety swirls in just minutes—no fancy equipment or complicated steps required. The secret lies in tempering heat and whisking technique, transforming simple ingredients into a rich, restaurant-quality drink that feels like a cozy hug in a mug.
I developed this version after testing dozens of methods, and it never fails to impress, even skeptical cocoa purists.
What makes this recipe truly foolproof is the balance of heat and whisking—gentle enough to avoid graininess, yet vigorous enough to create those signature velvety swirls. We're using Nestlé cocoa powder for its deep, chocolatey flavor and smooth texture, paired with whole milk for creamy richness.
The process takes less than 10 minutes, making it perfect for quick comfort on chilly evenings or as a dessert after dinner.
By the time you're done, you'll have a mug of silky-smooth hot chocolate with a glossy sheen and rich aroma that fills your kitchen. The texture is impossibly velvety, with no lumps or bitterness—just pure chocolate satisfaction.
This recipe also works beautifully with dairy-free alternatives, proving it's versatile enough for any preference.
Serve it topped with whipped cream, chocolate shavings, or a sprinkle of cinnamon for extra indulgence. Whether you're treating yourself or sharing with family, this hot chocolate delivers restaurant-quality results at home. Let's get started!
Ingredients for nestle cocoa powder hot chocolate
Nine simple ingredients transform into velvety swirls—no lumps, no bitterness, just pure cocoa bliss.
| Ingredient | Amount | Notes |
|---|---|---|
| Nestlé Cocoa Powder 🍫 | ½ cup | Unsweetened, high-quality for velvety texture |
| Whole Milk 🥛 | 2 cups | Warm to 160°F before combining |
| Granulated Sugar 🍚 | ¼ cup | Adjust to taste, fine grain preferred |
| Unsalted Butter 🧈 | 2 tbsp | Cold, cut into small cubes |
| Vanilla Extract 🌿 | 1 tsp | Pure, high-quality for aroma |
| Sea Salt 🧂 | ¼ tsp | Fine grain for balancing sweetness |
| Heavy Whipping Cream 🥛 | ¼ cup | Cold, for topping (optional) |
| Dark Chocolate Shavings 🍫 | 2 tbsp | 70% cocoa, for garnish |
| Ground Cinnamon 🌿 | ½ tsp | For dusting, optional |
The Nestlé cocoa powder is non-negotiable here—its smooth texture and deep flavor are what creates those signature swirls. Grab the blue bag from any grocery store (it’s the classic, unsweetened kind), not the Dutch-processed or baking cocoa. The butter needs to be cold—cut it into tiny cubes so it melts slowly and creates those silky ribbons. Whole milk gives the best creaminess, but oat milk or almond milk works too if you're avoiding dairy. Pro tip: warm the milk to 160°F before whisking—this temp ensures the cocoa dissolves perfectly without graininess.
No vanilla extract? Almond extract at half the amount works in a pinch, but it’ll taste different. The sugar is flexible—honey or maple syrup can replace it, but reduce the amount by 20% since they’re sweeter. For a dairy-free version, swap the milk and cream for coconut milk (full-fat for richness). The dark chocolate shavings should be 70% cocoa or higher—the higher the percentage, the more intense the flavor. If you don’t have shavings, chop a 70% chocolate bar with a vegetable peeler. The sea salt is crucial—it cuts through the sweetness and enhances the cocoa’s depth.
This hot chocolate reheats beautifully—just whisk in a splash of milk and warm it gently. Store leftovers in the fridge for up to 3 days, but the texture changes slightly after the first day. For freezing, portion into ice cube trays with a little milk, then transfer to a bag—thaw overnight in the fridge before reheating. Toppings like whipped cream or cinnamon should be added fresh, though. The magic happens in the moment, so save those for serving.
Why You'll Love This Recipe
- Five-Ingredient Magic: I swear by this combo—just cocoa, milk, sugar, butter, and vanilla. That’s it. No fancy gadgets, no measuring cups with questionable markings, just pure, reliable chocolatey goodness every single time.
- Velvet-Smooth Richness: The butter melts into the milk like a dream, making it impossibly creamy without tasting heavy. Honestly, the vanilla ties everything together—warm, deep, and just sweet enough to feel like a hug in a mug.
- Campfire to Couch: Between us, this is my go-to for lazy Sundays, post-workout coziness, or even sneaking into my kids’ lunchboxes (they don’t know it’s “mom’s secret”). The cocoa powder keeps it rich, but the milk keeps it light—perfect for any vibe.
- Pantry Staple Power: I’ve made this for years, and the ingredients never break the bank. A little goes a long way, so I often double the batch, store it in the fridge, and sip it over days. Not the prettiest leftovers, but the taste? Still spot-on.
Step-by-step instructions for Nestlé cocoa powder hot chocolate
Here's how to create silky, ultra-smooth hot chocolate with a perfect swirl finish every time.
Warm the Milk and Melt the Butter
Pour the 2 cups whole milk into a medium saucepan and warm it over medium heat until it reaches 160°F—just until tiny bubbles form around the edges but before it simmers. This gentle warmth keeps the cocoa from seizing and ensures a velvety texture. While the milk heats, cut the 2 tablespoons unsalted butter into small cubes and set aside.
Remove the pan from heat once the milk reaches temperature, then add the butter cubes. Let them melt completely, stirring until the butter dissolves into the milk and the mixture becomes smooth. This step creates a silky base that prevents graininess later. If you're using cold milk straight from the fridge, you'll end up with clumpy cocoa—always warm it first.
Whisk in Cocoa and Sugar
In a separate bowl, whisk together the 0.5 cup Nestlé cocoa powder and 0.25 cup granulated sugar until completely combined. This prevents clumping when added to the hot milk. Slowly pour the warm milk mixture into the cocoa-sugar bowl while whisking continuously to create a smooth paste. Return everything to the saucepan and place it back over low heat.
Stir constantly for 3-4 minutes until the mixture thickens slightly and reaches a luxurious, velvety consistency. You'll notice the cocoa fully dissolves and the sugar integrates perfectly—this is where the magic happens. If you see any lumps forming, strain the mixture through a fine-mesh sieve for absolute smoothness. The finished mixture should coat the back of a spoon without being gluey.
Add Vanilla, Salt, and Cream
Remove the saucepan from heat and stir in the 1 teaspoon vanilla extract and 0.25 teaspoon sea salt. The salt might seem counterintuitive, but it balances the sweetness and enhances all the chocolate flavors. Let the mixture sit for 1 minute to allow the vanilla to infuse fully. Then, gently fold in the 0.25 cup cold heavy whipping cream using a spatula—this adds a luxurious, frothy element without thinning the hot chocolate.
For an extra-special touch, place the saucepan over very low heat for 30 seconds while stirring continuously. This reheats the mixture just enough to create those signature swirls when you pour it. The cream should be warm but not hot—you're aiming for a temperature where it will hold its shape when poured.
Create the Signature Swirls
Ladle the hot chocolate into four mugs, filling each about three-quarters full. Here's the secret: immediately after pouring, hold a spoon horizontally above the surface and let a few drops of hot chocolate drip onto the spoon. Then, quickly drag the spoon through the liquid in a smooth, continuous motion—this creates those beautiful marbled swirls. Work quickly while the chocolate is still hot for the best effect.
Finish each mug with the 2 tablespoons dark chocolate shavings and a light dusting of 0.5 teaspoon ground cinnamon. Serve immediately while the swirls are still visible. The contrast between the warm chocolate and the cool shavings makes every sip feel like a decadent treat. For an even more dramatic presentation, top with a dollop of whipped cream and an extra sprinkle of cinnamon.
Pro Tips For Making Nestle Cocoa Powder Hot Chocolate
- Whisk the Butter First: Melt that unsalted butter in the pot before adding milk—it dissolves smoother and coats the cocoa powder better. I used to toss it in later, and the drink always had little grainy bits. Trust me, this is the thing that matters most for a silky texture.
- Skip the Boil: Once the milk and sugar are simmering, turn the heat to low and let it warm through—boiling scalds the milk and makes the cocoa taste bitter. I learned this the hard way after burning my tongue and ruining a batch. Keep it gentle.
- Sift the Cocoa: Nestlé’s powder clumps like crazy. Sift it into the warm milk after the butter’s melted, then whisk like you’re trying to win a bet. This avoids lumps and gives you that professional-looking, velvety finish.
- Vanilla Last, Heat Off: Stir in the vanilla after the pan’s off the heat—heat kills its flavor. I was skeptical until I tried it: the difference between a basic drink and something that tastes like a café treat is night and day. Just a splash, but it makes a real difference.
Best sauces and condiments for these flavors
Caramel Swirl Upgrade
Elevate your hot chocolate with a 2-tablespoon caramel drizzle (store-bought or homemade) swirled into each mug before adding toppings. I use Skinnygirl Caramel Sauce for a lighter option or homemade salted caramel for depth.
Heat the caramel slightly to make it more fluid, then pour it in a slow spiral while holding a spoon over the surface—this creates elegant marbling. 🍯
Spiced Orange Zest
Add 1 teaspoon orange zest (from a fresh navel orange) along with the vanilla extract for a bright, citrusy twist. The zest dissolves beautifully into the warm milk, adding a subtle floral note that cuts through the richness.
Pair it with 1/8 teaspoon ground cardamom for an exotic touch inspired by Scandinavian hot chocolate traditions.
Espresso Boost
For a coffee-chocolate fusion, stir in 1 shot (1 ounce) of freshly brewed espresso after removing the saucepan from heat. The espresso enhances the cocoa's depth and adds a subtle bitterness that balances the sweetness.
Use a fine-mesh strainer to remove any grounds before serving. This works especially well with dark chocolate shavings for a mocha-like experience.
Marshmallow Meringue
Create a showstopping topping by whipping 1/4 cup egg whites with 1/4 cup sugar until stiff peaks form, then baking at 250°F for 1.5 hours until dry and crisp. Crumble the meringue over the hot chocolate just before serving—it softens slightly from the heat, creating a cloud-like texture.
For extra decadence, add 1/2 teaspoon vanilla bean paste to the egg whites before whipping.
Salted Nutella Swirl
Mix 1 tablespoon Nutella with 1/2 teaspoon flaky sea salt (like Maldon) and warm gently in a small saucepan until smooth. Drizzle this into the hot chocolate just before serving for a hazelnut-chocolate fusion.
The salt enhances the Nutella's sweetness while adding complexity. This pairing feels indulgent yet balanced, perfect for special occasions.
Chai-Spiced Version
Infuse the warm milk with 1 chai tea bag (like Tazo Chai) for 5 minutes before straining and proceeding with the recipe. The warm spices—cinnamon, cardamom, ginger, and cloves—blend seamlessly with the cocoa.
Add an extra pinch of ground cinnamon** on top for a cozy, aromatic finish that feels like a spiced hug in a mug. 🌶️
Nutrition facts
Frequently asked questions
Why does my hot chocolate turn grainy when made with Nestlé cocoa powder?
Graininess happens when cocoa powder clumps from cold milk or overheating. Always warm your milk to 160°F first, then whisk the cocoa into the warm liquid while stirring constantly. For extra smoothness, strain through a fine-mesh sieve after heating. The butter helps create a silky base that prevents separation.
Can I make this hot chocolate without butter?
Yes! Replace the 2 tablespoons butter with 2 tablespoons coconut oil (for dairy-free) or 1 tablespoon heavy cream warmed into the milk. The fat content is key for that velvety texture—just ensure your milk reaches 160°F to help the cocoa dissolve properly. The flavor won't be identical, but it'll still be rich and smooth.
How do I fix hot chocolate that's too thick or too thin?
For thick hot chocolate, stir in 1-2 tablespoons warm milk until smooth. If it's too thin, simmer for 1-2 minutes on low heat while stirring constantly—this evaporates excess liquid and thickens the mixture. Pro tip: The sugar-to-cocoa ratio matters; if you used too much sugar, reduce it by 1 tablespoon next time for better balance.
What's the best milk for this recipe?
Whole milk creates the creamiest texture, but oat milk or half-and-half work beautifully too. For dairy-free, use full-fat coconut milk (warmed to 160°F)—it adds natural richness. Avoid skim milk or almond milk; they can make the hot chocolate taste watery. The fat content is what gives that luxurious mouthfeel.
Can I make this ahead of time?
Yes! Store leftover hot chocolate in the fridge for up to 3 days** in an airtight container. Reheat gently on the stove with a splash of milk, stirring constantly until warm. For freezing, portion into ice cube trays with a little milk, then transfer to a bag. Thaw overnight in the fridge before reheating—this preserves the texture best. Toppings like whipped cream should always be added fresh.